
Owners manual


138 | Captive Portal for Guest Access Aruba Instant 6.4.0.2-4.1 | User Guide
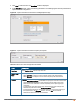
Field Description
l To change the policy text, click the second square in the splash page, type the
required text in the Policy text box, and click OK. Ensure that the policy text does
not exceed 255 characters.
l Specify the URL to which you want to redirect the guest users.
l To upload a custom logo, click Upload your own custom logo Image, browse the
image file, and click upload image.
l Click Preview to preview the Captive Portal page.
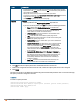
External
If External is selected, perform the following steps:
l Select a profile from the Captive portal profile drop-down list.
l If you want to edit the profile, click Edit and update the following parameters:
l Type—Select either Radius Authentication (to enable user
authentication against a RADIUS server) or Authentication Text
(to specify the authentication text to returned by the external
server after a successful user authentication).
l IP or hostname— Enter the IP address or the hostname of the
external splash page server.
l URL— Enter the URL for the external splash page server.
l Port—Enter the number of the port to use for communicating with
the external splash page server
l Redirect URL—Specify a redirect URL if you want to redirect the
users to another URL.
l Captive Portal failure—This field allows you to configure Internet
access for the guest clients when the external captive portal
server is not available. Select Deny Internet to prevent clients
from using the network, or Allow Internet to allow the guest
clients to access Internet when the external captive portal server
is not available.
l Automatic URL Whitelisting— Select Enabled or Disabled to
enable or disable automatic whitelisting of URLs. On selecting
the checkbox for the external captive portal authentication, the
URLs allowed for the unauthenticated users to access are
automatically whitelisted. The automatic URL whitelisting is
disabled by default.
l Auth Text—Indicates the authentication text returned by the
external server after a successful user authentication.
6. Click OK. The enforce captive portal rule is created and listed as an access rule.
7. Create a role assignment rule based on the user role, to which the captive portal access rule is assigned.
8. Click Finish.
The client can connect to this SSID after authenticating with username and password. After a successful user login,
the captive portal role is assigned to the client.
In the CLI
To create a captive portal role:
(Instant AP)(config)# wlan access-rule <Name>
(Instant AP)(Access Rule <Name>)# captive-portal {external [profile <name>]|internal}
(Instant AP)(Access Rule <Name>)# end
(Instant AP)# commit apply