
Owners manual


Parameter Description
Disable if uplink type is To exclude uplink, select an uplink type.
Encryption
(Applicable for WLAN SSIDs
only.)
Select Enabled to configure encryption parameters.
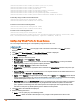
Splash Page Design Under Splash Page Visuals, use the editor to specify text and colors for the initial
page that will be displayed to the users connecting to the network. The initial page
asks for user credentials or email, depending on the splash page type (Internal -
Authenticated or Internal -Acknowledged) for which you are customizing the splash
page design. Perform the following steps to customize the splash page design.
l To change the color of the splash page, click the Splash page rectangle and
select the required color from the Background Color palette.
l To change the welcome text, click the first square box in the splash page, type
the required text in the Welcome text box, and click OK. Ensure that the welcome
text does not exceed 127 characters.
l To change the policy text, click the second square in the splash page, type the
required text in the Policy text box, and click OK. Ensure that the policy text does
not exceed 255 characters.
l To upload a custom logo, click Upload your own custom logo Image, browse the
image file, and click upload image. Ensure that the image file size does not
exceed 16 KB.
l To redirect users to another URL, specify a URL in Redirect URL.
l Click Preview to preview the Captive Portal page.
NOTE: You can customize the captive portal page using double-byte characters.
Traditional Chinese, Simplified Chinese, and Korean are a few languages that use
double-byte characters. Click on the banner, term, or policy in the Splash Page
Visuals to modify the text in the red box. These fields accept double-byte characters
or a combination of English and double-byte characters.
3. Click Next to configure access rules.
In the CLI
To configure internal captive portal authentication:
(Instant AP)(config)# wlan ssid-profile <name>
(Instant AP)(SSID Profile <name>)# essid <ESSID-name>
(Instant AP)(SSID Profile <name>)# type <Guest>
(Instant AP)(SSID Profile <name>)# captive-portal <internal-authenticated> exclude-uplink
{3G|4G|Wifi|Ethernet}
(Instant AP)(SSID Profile <name>)# mac-authentication
(Instant AP)(SSID Profile <name>)# auth-server <server1>
(Instant AP)(SSID Profile <name>)# radius-reauth-interval <Minutes>
(Instant AP)(SSID Profile <name>)# end
(Instant AP)# commit apply
To configure internal captive portal for a wired profile:
(Instant AP) (config)# wired-port-profile <name>
(Instant AP) (wired ap profile <name>)# type <guest>
(Instant AP) (wired ap profile <name>)# captive-portal {<internal-authenticated>| <internal-
acknowledged>} exclude-uplink {3G|4G|Wifi|Ethernet}
(Instant AP) (wired ap profile <name>)# mac-authentication
(Instant AP) (wired ap profile <name>)# auth-server <server1>
(Instant AP) (wired ap profile <name>)# radius-reauth-interval <Minutes>
(Instant AP) (wired ap profile <name>)# end
(Instant AP)# commit apply
To customize internal captive portal splash page:
Aruba Instant 6.4.0.2-4.1 | User Guide Captive Portal for Guest Access | 129