
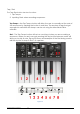
User Manual


Arturia Microbrute User’s Manual 48
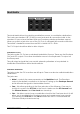
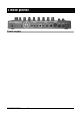
The Power button turns the power on/off.
The DC connector receives the MicroBrute’s external power supply plug.
Only connect the 12V DC, 1A, center positive power supply that came with your
MicroBrute. Connecting any other power supply could damage the MicroBrute.
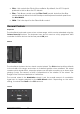
USB
The USB port allows interfacing with a personal computer. It can be used for
MIDI communication, as well as editing some of the synthesizer internal
parameters such as MIDI channel, sequencer settings, or updating the
firmware, through the MicroBrute Connection software.
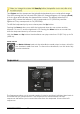
MIDI
The MIDI In jack lets your MicroBrute be controlled from other MIDI
devices. You can use MicroBrute as a sound module and connect a full
sized MIDI Keyboard, like our Arturia Keylab 49 or 61, if you want a wider
playing range or if you just want full sized keys. If you are using MicroBrute
as a sound module, use a MIDI cable to connect MicroBrute MIDI In
connector to your external MIDI device’s MIDI Out connector.
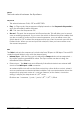
Audio In
The Input Level potentiometer adjusts the amount of an external
audio source (guitar, synth, drum machine, etc.) that can be
plugged into the MicroBrute signal chain via the rear panel Audio
Input jack. This makes it possible to process an external audio signal
with the filter and amplifier; also note that this signal can trigger the
envelopes. NOTE: this is a line level input. To use this with a guitar or
microphone you will need to boost the levels with a pre-amp first.
The Input Level knob is recessed so that it does not get in the way. Just push on the knob
and it will pop out for adjustment. When finished, just push it back in.
Fine Tune
The Fine Tune knob provides precision adjustment of the oscillator pitch.
The 12 o'clock position corresponds to the default tuning (i.e. A=440Hz)