
User Manual

Setting up the C1USB in Mac OS-X
1) Plug in microphone. The LED will light to indicate it is receiving USB
power
. The Mac will recognize the USB audio device and automati-
cally install a universal driver.
2) To select the C1USB as the computers audio input, open the System
Preferences from the dock or the main Apple Menu
3) Next open the Sound preference
4) Now, click in the Input tab and Output Tab to select C1USB
High Performance USB Condenser
Microphone Package
Setting up the C1USB in Windows XP
(with Service Pack 2 - other versions may vary slightly)
1) Plug in microphone. The LED will light to indicate it is receiving USB
power. WindowsXP will recognize the USB audio device and
automatically install the universal drivers
2) The C1USBis now recognized as a Windows audio device under the
name USBMIC. To set it as the default device and change computer-
controlled gain, access control panel. Access Sounds and Audio
Devices through Control Panel.
3) Select C1USB as Sound recording device in the Audio tab window.
You may also have to select the microphone in most pro audio programs
where multiple devices must be set within the program.
4) T
o set the microphone Gain, click the Volume button. The Wave In
window sets the computer controlled gain, pan and microphone mute.
5) Select C1USB as the Output Device in the Audio Tab Window and
set level.
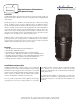
Powering the C1USB
The C1USB is a condenser microphone, and like all condenser
microphones, it has internal electronics that require an active power
supply. Traditional studio condensers are almost always powered by
a Phantom Power supply, from a mixing console or external pre-amp.
The C1USB receives its power from the USB bus. Simply connect the
microphone to the computer’
s USB port and the microphone is ready
to operate. The C1USB features a power LED, which will illuminate
when USB power is present.
Microphone Placement
A cardioid polar pattern like that used in the C1USB is generally the
standard for most applications. A cardioid pattern will deliver best
results on most vocal recordings and on a wide range of solo
instruments. It offers full frequency response on the front of the
microphone and the advantage of proximity effect (increased low fre-
quency response when microphone is placed close to sound source*).
A cardioid pattern also provides excellent noise rejection from the sides
and back, or 180-degree position of the microphone, minimizing
feedback and interference from other audio sources.
*Vocalists can use the proximity effect to their advantage, adding
fullness and more 'bottom end' to the voice as they move closer to the
microphone. Experienced vocalists can easily incorporate it as part of
their overall microphone technique. Experimentation with microphone
placement during the recording process is the key.
Canada: Yorkville Sound - 550 Granite Court, Pickering, Ontario - Canada L1W 3Y8
USA: Yorkville Sound - 4625 Witmer Industrial Estate - Niagara Falls, NY USA 14305
Specifications:
Type: Side Address Cardioid Condenser USB Microphone
Capsule:
32mm Wide Diaphragm Gold Sputtered Capsule
Controls: Headphone Level, Microphone/Playback Mix Level
-10dB Pad, Input Gain Control, Low Frequency Roll Off
Headphone Output: 1/8th-inch TRS Stereo Jack
Frequency Response: 20Hz to 20kHz
MAX SPL:
130dB
S/N Ratio:
86dB
Sensitivity: -35dB (+/-2dB) (0dB=1v/Pa 1kHz)
Equivalent Noise: 20dB (A Weighted)
A/D Conversion:
16-bit / 48 kHz sampling rate
Output: USB Type 2.0 (3m cable included)
Included Accessories: Zipped Carry Bag, Mic Stand, Mic Stand Mount,
3m (10’) USB Cable
Dimensions: 37mm x 175mm / 1.5 inches x 6.9 inches
Weight 16oz / 469g