
Manual

22
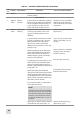
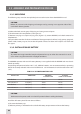
TABLE 31. PREVENTIVE MAINTENANCE PROCEDURES
ITEM
NO.
INTERVAL CHECK/SERVICE PROCEDURE NOT FULLY MISSION CAPABLE IF
1 Before Open carrying case and check the
inventory items
2 Before/
After
Optical
Surfaces
MONOCULAR
Inspect all lenses (objective, eyepiece,
IR lens and high light cut-o window)
for dirt, ngerprint residue, chips, or
cracks. If necessary, clean and dry
lenses with water and lens tissue.
Scratches or heavy scratches
that hinder vision with mon-
ocular turned ON, or if cracks
are present.
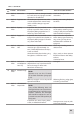
3 Before/
After
Battery Cap
Housing
Inspect external surfaces for cracks
or damage. Scratches, cracks, and
gouges are OK if operation is not
aected.
Inspect battery compartment. Check
to make sure battery cap is present.
Remove battery cap and inspect
for moisture, cracks, corroded or
defective spring contacts, and o-ring
present in cap.
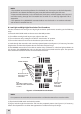
Remove battery and turn the power
switch from RESET/OFF to ON to IR/
PULL. Each position should have a
denite stopping point. Inspect for
broken or missing knob.
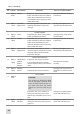
Install battery per paragraph 2.6. and
check IR source (and momentary IR
source, if so equipped) functions by
following the operating instructions in
paragraph 3.22.
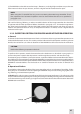
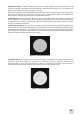
Check the high light cut-o with
daylight or bright room light (not uo-
rescent light) by placing the lens cap
on the objective lens. Turn monocular
ON and observe that the system cuts
OFF within 70 ±30 seconds.
Turn monocular OFF and then ON to
reenergize monocular.
NOTE:
If the monocular fails this highlight
cut-o test, it does not cause the
end item to be nonmission capable.
However, it should be sent to high-
er level of maintenance as soon as
possible.
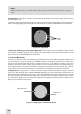
Check gain control for free movement
and operation per paragraph 3.2.5.
Cracks or damage in the bat-
tery housing.
Cap is missing, contacts dam-
aged, or corroded, o-ring is
missing.
Power switch has no denite
stopping points or knob is
broken or missing.
IR source does not work.
If damaged, refer to higher
level of maintenance.
Knob is not free moving or
does not vary gain.