DRAKOS Laser Aiming/Illumination Devices DRAKOS IR LASER POINTER Drakos-I IR LASER POINTER & IR LED ILLUMINATOR Drakos-II IR LASER POINTER & VISIBLE RED LASER POINTER Operation and Maintenance Manual
SAFETY SUMMARY Before operating this product, carefully study this Operation and Maintenance Manual. The Drakos Laser Aiming Device (LAD) is a precision electro-optical instrument, and requires careful handling. To avoid physical danger or equipment damage when operating the Drakos, follow all WARNINGS, CAUTIONS and NOTES. Below you will find definitions of the following alerts that appear throughout this manual: WARNING — Identifies a clear danger to the person operating the equipment.
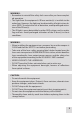
WARNING: • Remember to reinstall the safety lock screw after you have completed operation. • The light from the equipment’s IR laser emitter(s) is invisible to the naked eye. However, the light can be detected by all night vision devices (NVD). To reduce the risk of detection, avoid prolonged activation of the IR laser(s). • The IR light is more detectable by other NVDs when used in smoke, fog and rain. Avoid prolonged activation of the IR laser(s) in these conditions.
NOTES: • Remember to zero your weapon prior to installing the Drakos or adjusting the boresight. • To operate the Drakos’ IR channel(s), you will need to wear night vision goggles (NVG).
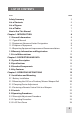
LIST OF CONTENTS TITLE PAGE Safety Summary List of Contents List of Figures List of Tables How to Use This Manual 2 5 6 7 7 Chapter 1. INTRODUCTION 1.1 General Information 1.1.1 Type of Manual 1.1.2 Equipment Name and Letter Designation 1.1.3 Purpose of Equipment 1.1.4 Reporting Equipment Improvement Recommendations 1.2 Warranty Information and Registration 1.3 List of Abbreviations 8 8 8 8 8 9 9 12 Chapter 2. DESCRIPTION AND DATA 2.1 System Description 2.2 Specifications 2.3 Standard Components 2.
Chapter 4. PREVENTIVE MAINTENANCE AND TROUBLESHOOTING 4.1 Preventive Maintenance Checks and Services 4.2 Operator Troubleshooting 4.3 Maintenance 4.3.1 General 4.3.2 Cleaning Procedures 4.3.3 Boresight Testing 4.3.4 Battery Removal and Replacement 27 27 30 31 31 31 32 32 APPENDIX A. Product Warranty Registration Card APPENDIX B. List of Spare Parts 34 35 LIST OF FIGURES FIGURE TITLE 2-1a 2-1b 2-1c 2-1d 2-2 3-1 3-2 3-3 3-4 3-5 3-6 3-7 4-1 B-1 Laser Aiming Device. Drakos Laser Aiming Device.
LIST OF TABLES TABLE TITLE 1-1 2-1 2-2 2-3 2-4 2-5 2-6 3-1 3-2 4-1 4-2 B-1 Drakos Series. Function Definition System Description Mechanical Data Optical Data Electrical Data Environmental Data Standard Components Controls Operation Modes Preventive Maintenance Checks and Services Operator Troubleshooting Spare Parts List PAGE 8 15 16 16 17 17 18 22 23 28 30 35 How to Use This Manual USAGE You must familiarize yourself with the entire manual before operating the equipment.
1 INTRODUCTION 1.1 1.1.1 GENERAL INFORMATION Type of Manual Operation and Maintenance (including a List of Spare Parts). 1.1.2 Model Number and EQUIPMENT NAME Drakos Laser Aiming Device. IR Laser Pointer Class I with Quick-Release Mount (QRM) and Wireless Remote Control. Drakos-I Laser Aiming Device. Dual Channel: IR 850 Laser Pointer Class I & IR LED 850 Illuminator with QRM and Wireless Remote Control. Drakos-II Laser Aiming Device.
The adjustable laser output ensures easy and accurate aiming in a wide range of ambient light. The IR aiming channel is intended for use at night (under moonlight, starlight conditions, etc.), in poor visibility, and in changing light conditions. The long-range IR illuminator should be used when there is little-to-no ambient light. Night vision goggles are required when using the IR channels.
chandise that has been discontinued by the manufacturer and either parts or replacement units are not available due to reasons beyond the control of Armasight.
1.2.3 PRODUCT WARRANTY REGISTRATION In order to validate the warranty on your product, Armasight must receive a completed Product Warranty Registration Card for each unit, or the Customer can complete a warranty registration on our website, at www.armasight. com. Please complete the included form (Appendix C) and immediately mail it to our Service Center: Armasight Inc. 815 Dubuque Avenue South San Francisco, CA 94080 USA 1.2.
1.3 C cm CW CCW F H hr Illum kg L LAD m max mils min mm MOA MPI mW nm NO.
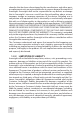
2 DESCRIPTION AND DATA 2.1. SYSTEM DESCRIPTION The LAD is a weapon aiming system that uses a laser to indicate the point of impact. The equipment is available in five functionally different versions, which are presented in Table 1-1 of this manual. The LAD uses continuous diode lasers, which produce both visible and invisible radiation; both are potentially hazardous to your eyes. You will find the laser safety classification of your device on the warning label(s) near the laser emission aperture(s).
2 1 FIGURE 2-1a. LASER AIMING DEVICE. DRAKOS 4 3 1 FIGURE 2-1b. LASER AIMING DEVICE. Drakos-I 1 2 5 FIGURE 2-1c. LASER AIMING DEVICE.
6 7 8 16 9 15 10 11 12 14 13 FIGURE 2-1d. LASER AIMING DEVICE TABLE 2-1. SYSTEM DESCRIPTION ITEM NO.
2.2 SPECIFICATIONS TABLE 2-2. MECHANICAL DATA DATA ITEM Elevation/Windage Adjustment Range (MOA, min) Elevation/Windage Adjustment Increment (mils) DRAKOS Drakos-I Drakos-II ±90 ±90 ±90 0.5±0.05 (5cm 0.5±0.05 (5cm 0.5±0.05 (5cm at a distance at a distance at a distance of of 100m) of 100m) 100m) Boresight Accuracy after 1000 Shots Fired from a Weapon (mils) 0.5* 0.5* 0.5* Boresight Accuracy after 100 Reinstallations of the LAD on a Picatinny Rail (mils) 1.0* 1.0* 1.
TABLE 2-4. ELECTRICAL DATA DATA ITEM DRAKOS Battery Drakos-I Drakos-II Single CR123A Lithium (3V) or AA Alkaline (1.5V)* Single CR123A Lithium (3V)** Single CR123A Lithium (3V) or AA Alkaline (1.5V)* 42 2 27 Battery Life at 20°C/ 68°F (hr, min) * Any AA or CR123 type rechargeable batteries with voltage from 1.2V to 3.2V can be used ** Any CR123 type rechargeable batteries with voltage 3.2V can be used TABLE 2-5.
TABLE 2-6. STANDARD COMPONENTS ITEM NO. DESCRIPTION Laser Aiming Device A laser aiming system equipped with a Picatinny quick-detach mount. CR123A Lithium Battery A single, CR123A (3V) battery used to power the LAD. Remote Control Unit Wireless control used to operate the LAD in short-time activation mode. Ensures quick and silent activation/deactivation of the device. Delivered with CR2032 (3 V) battery installed.
3 OPERATING INSTRUCTIONS 3.1. INSTALLATION AND MOUNTING 3.1.1 Battery Installation CAUTION: Verify that the device is OFF before installing a battery. Install the battery as follows (refer to Figure 3-1): 1. Unscrew the battery cap (A). 2. Check the position of the adapter (B) (only Drakos and Drakos-II). See Figure 3-2 for the correct positioning of the threaded adapter, which changes depending on the battery being installed. If necessary, change the adapter position in the cap. 3.
3.1.2 MOUNTING THE LAD ON A PICATINNY/WEAVER WEAPON RAIL NOTE: Remember to zero your weapon prior to installing the LAD or adjusting the boresight. WARNING: When installing the equipment on a weapon, be sure the weapon is CLEAR and that the SAFETY is on before proceeding. Figure 3-3 shows a single-channel LAD installed on a Picatinny weapon rail. FIGURE 3-3. LAD INSTALLED ON A PICATINNY WEAPON RAIL Install the LAD on a Picatinny/ Weaver rail as follows (refer to Figure 3-4): 1.
a b c FIGURE 3-5. MOUNT. UNDERSIDE VIEW 3.1.3 CLAMPING DEVICE ADJUSTMENT Adjust the mount clamping device as follows (refer to Figure 3-5): 1. Unlock the clamping device and remove the LAD from the weapon. 2. To tighten/loosen the clamping device, push the cam (C) towards the arrow (which will cause the nut (A) to slide out of the hole) and turn the nut (A) CW/CCW, respectively, in one-two increments (see note below).
3.2. CONTROLS The LAD controls are shown in Figure 3-7 and defined in Table 3-1. The ITEM NO. column indicates the number used to identify items in Figure 3-7. 4 1 2 3 5 FIGURE 3-7. CONTROLS TABLE 3-1. CONTROLS ITEM NO. CONTROL FUNCTION 1 ON Button Activates the laser(s) after the required operation mode has been selected with the switch. When the LAD is activated, this activates standby mode.
TABLE 3-1. CONTINUED ITEM NO. CONTROL FUNCTION Adjust the laser(s) boresight. NOTE: When turning the screws, adjustment mechanisms click in increments corresponding to the minimum boresight correction value 0.5 mils (5cm at a distance of 100m). The circular scales are indexed in 0.5 mils adjustment increments. Elevation and windage adjustment ranges are covered in approximately 4 turns of the screws.
3.3. OPERATING PROCEDURES NOTE: When operating the LAD’s IR channel(s), you must wear night vision goggles. CAUTION: DO NOT force the equipment controls past their stopping points. 3.3.1 BORESIGHT ADJUSTMENT PROCEDURE NOTE: Before adjusting the LAD boresight for the first time, fire approximately 10 shots from the weapon with the device installed, in order to stabilize the adjustment mechanisms under applied shocks.
8. Work out the values of the elevation and windage corrections required to compensate for the measured deviation of the mean point of impact (MPI) from the center of the target. The minimum correction value of 0.5 mils (5 cm at a distance of 100 m) corresponds to one click of the adjustment mechanisms. 9. Adjust the equipment boresight by turning the adjustment screws and counting out a definite number of clicks (or reading the scales).
WARNING: The IR light from the equipment’s IR laser(s) is invisible to the naked eye. However, the light can be detected by all night vision devices. To reduce the risk of detection, avoid prolonged activation of the IR laser(s). NOTE: To switch the activated equipment to another operation mode, turn the switch to the desired position and reactivate the laser(s) by pushing ON. 3.3.3 LAD SHUT-DOWN To shut down the LAD: 1. Turn the switch to OFF. 2. Replace the cap(s) on the laser output aperture(s). 3.
4 PREVENTIVE MAINTENANCE AND TROUBLESHOOTING 4.1. PREVENTIVE MAINTENANCE CHECKS AND SERVICES (PMCS) Table 4-1: Preventive Maintenance Checks and Services has been provided so that you can keep your equipment operable and in good condition. Perform all functional tests in the order listed in Table 4-1. Operating Procedures are detailed in Chapter 3. Always observe any WARNINGS and CAUTIONS that appear in the table. Explanation of Table Entries: — SEQ NO. column.
TABLE 4-1. PREVENTIVE MAINTENANCE CHECKS AND SERVICES SEQ NO. LOCATION/ ITEM TO INSPECT/ CHECK/ SERVICE 1 Completeness 2 Body 3 Laser Aperture Cap(s) 4 Battery Compartment/ Cap with Adapter 5 Adjustment Screw Caps 6 7 8 9 28 Mode Select Switch Laser Aperture Protective Glass(es) Remote Control Unit Mount PROCEDURE BEFORE OPERATION CHECKS Inventory items by comparing them with the data specified in this manual. Inspect for dirt, cracks, or damage.
TABLE 4-1. CONTINUED SEQ NO. LOCATION/ ITEM TO INSPECT/ CHECK/ SERVICE PROCEDURE NOT FULLY MISSION CAPABLE IF... OPERATIONAL CHECKS WARNINGS: NEVER LOOK INTO THE LASER BEAM. When performing operational checks, beware of reflections from optical surfaces. NOTE: You must wear NVG when checking IR channel(s). Install the battery. Turn the switch to the position corresponding to the minimum laser output of the aiming channel. Push the ON button down to activate the laser. 10 Aiming Laser(s) No aiming dot.
TABLE 4-1. CONTINUED LOCATION/ ITEM TO INSPECT/ CHECK/ SERVICE SEQ NO. NOT FULLY MISSION CAPABLE IF... PROCEDURE AFTER CHECKING PROCEDURES Turn the switch to OFF. Replace the cap(s) on the laser output aperture(s). Remove the battery. Return the equipment and all accessories to the storage/carrying carton. 14 4.2.
TABLE 4-2. CONTINUED MALFUNCTION Remote control does not work. PROBABLE CAUSE/ TEST/ INSPECTION Battery is missing or improperly installed. Battery is dead. Battery surfaces or contacts are dirty or corroded. Remote control unit is damaged. Battery adapter difficult Inspect for damaged batto remove (Drakos and tery adapter and battery cap. Drakos-II only). Dirty cap thread. Hindered rotation of Damaged cap thread. the battery cap. 4.3. MAINTENANCE 4.3.
4.3.2 CLEANING PROCEDURES Clean the LAD as follows: 1. Gently brush off any dirt from the equipment using a clean, soft cloth. 2. Moisten the cloth with fresh water and gently wipe down the external surfaces (except for glass surfaces). 3. Dry any wet surfaces (except for glass surfaces) with another dry, clean, soft cloth. 4. Using a lens brush, carefully remove all loose dirt from the surface(s) of the laser aperture protective glass(es). 5.
A FIGURE 4-1. REMOTE CONTROL UNIT.
APPENDIX A PRODUCT WARRANTY REGISTRATION CARD In order to validate the warranty on your product, Armasight must receive a completed Product Warranty Registration Card for each unit, or the user must complete a warranty registration form, which can be found on our website at www.armasight.com. Please complete the included form and immediately mail it to our Service Center: Armasight Inc.
APPENDIX B LIST OF SPARE PARTS The parts authorized in the below list of spare parts, common to all versions of the LAD, are required for operator maintenance. This list includes parts that must be removed in order to replace any authorized parts. The ITEM NO. column in Table B-1 indicates the number used to identify items in Figure B-1. The PART NO. column indicates the primary number used by the manufacturer to identify an item. 5 6 8 10 11 9 3 7 1 5 2 4 3 FIGURE B-1. SPARE PARTS TABLE B-1.
Armasight Inc. 815 Dubuque Avenue South San Francisco, CA 94080 Phone: (888)959-2259 Fax: (888)959-2260 Intl Phone/Fax: (650)492-7755 info@armasight.com www.armasight.