
Assembly Instructions


9
Assembly Instructions
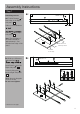
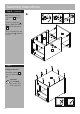
Step - continued 6
b:
Carefully locate the
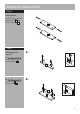
Step 7
Fixing back panel
Attach Back panel
onto the unit using Nails
.
H
12
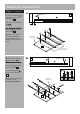
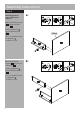
Important:
The unit MUST
be ‘square’ when
back is attached.
Insert 4 Locking nuts
into the Right side panel
and Left side panel
.
G
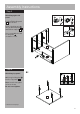
Use a screwdriver to turn
Locking nuts clockwise
to lock.
G
3
2
3
2
1
G
G
12
H
H
H
H
H
H
H
H
H
H
b:
1
Top panel onto the
unit.
G