
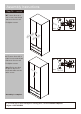
Assembly Instructions
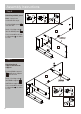

Step 11 - continued
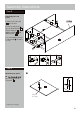
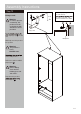
Assembly Instructions
13
e:
f:
e:
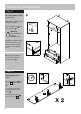
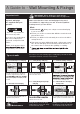
Place a small amount
of Glue into the groove
on the Drawer back panel
.
11
W
f:
Position the Drawer
back panel onto the
unit using Screws .
11
P
W
Repeat with remaining
1 drawer.
W
11
d:
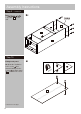
14
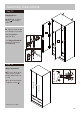
d:
Carefully slide the Drawer
bottom panel into the
grooves.
Insert 2 Locking nuts
into the holes (they will
only insert one way).
O
Use a screwdriver to turn
Locking nuts clockwise
to lock.
O
Place a small amount of
Glue into the grooves.
W
back surface
14
O
O
W
13
10
12
W
O
P
11
P
13
14
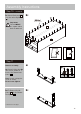
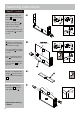
c:
Fix Drawer right side
12
10
panel onto the Drawer
front panel .
c:
Insert 2 Locking nuts
into the holes (they will
only insert one way).
O
Use a screwdriver to turn
Locking nuts clockwise
to lock.
O
O
O
O
10
12
13