
Assembly Instructions


8
Continued on next page.
Assembly Instructions
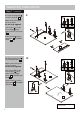
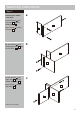
Step 3 - continued
Step 4
a:
Screw Locking pins
into the Top panel .
5
Note:
Insert locking pins
as far as shown.
Do not over tighten.
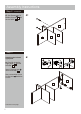
Attaching top panel
E
E
E
E
E
E
E
a:
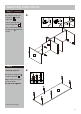
b:
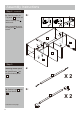
b:
Carefully locate the
Left panel onto the
Right shelf .
8
Insert 2 Locking nuts
into the Right shelf .
F
Use a screwdriver to turn
Locking nuts clockwise
to lock.
F
8
2
E
8
2
5
F
F
F