
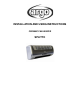
Installation instructions


STRUCTURE AND PARTS
REMOTE CONTROL – CONTROL PANEL and LCD DISPLAY ON THE UNIT
INSTALLATION INSTRUCTIONS
The fan heater must be installed on a wall before operating. Installation sequence of the fan
heater as follows:
1. Find a space where installing the fan heater (See fig.1).
2. Drill two holes suit to the dimension of expansible tube in the proper wall (See figure 2).
SPLITTO: D= 470 mm
3. Insert the expansible tubes into the holes and tighten them with screws provided
firmly.
NOTE: Do fasten the screws tight. Do not fasten the screw into the expansible tube
thoroughly; the length of the bared parts should be kept 3-5 mm.
Mount the fan heater to the wall (See figure 3). Make sure the two holes located on the
back of the heater do aim at the above two screws, then push the heater backwards to
the wall, and then downwards till stabilities the unit.
Wind in
Wind out cover
Main switch
Control panel
Figure 1
Figure 2
Figure 3
Remote control: inside a small
space on the right side of the
unit, covered by a sliding door.
By left, the symbols on the control panel of the unit
correspond to following functions:
1 - swinging of horizontal flaps
2 - room thermostat
3 - heating
4 - power (on/off).
LCD display contains the symbols concerning "swing",
"fan" - "H": High heating capacity (2000W) ;"L": Low
heating capacity (1000W).
By the top, buttons on remote control
correspond to following functions:
1 - ionizer
2 - swinging of horizontal flaps
3 - heating
4 - left: room thermostat; right: timer
5 - power (on/off)