
User manual


RP6 ROBOT SYSTEM - 4. Programming the RP6
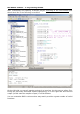
Also very helpful is an overview labelled “AVR Memory Usage” at the end:
Size after:
AVR Memory Usage
----------------
Device: atmega32
Program: 6858 bytes (20.9% Full)
(.text + .data + .bootloader)
Data: 148 bytes (7.2% Full)
(.data + .bss + .noinit)
This indicates that our program occupies 6858 Bytes in memory and reserves 148
Bytes RAM for static variables (of course this does not include dynamic values for
Heap and Stack, but explaining this would go beyond the scope of this manual. You
should always keep at least a few hundred bytes of free RAM). We have a total
amount of 32KB (32768 Bytes) Flash ROM and 2KB (2048 Bytes) RAM. The Boot load-
er requires 2K out of 32KB Flash ROM – leaving 30KB for free use. Always keep an
eye on the program size, to make sure that it fits into the available memory!
(The RobotLoader will not transfer to large programs!).
The above example program will leave 23682 free bytes in ROM. In fact, this rather
short example program RP6Base_LEDs.c is occupying so much of the available
memory because it contains the whole RP6Library! So don't worry, there is plenty of
space for your programs and small programs do not require too much memory. The
function library alone occupies more than 6.5KB flash memory, but it handles a lot of
important work for you already. Usually your programs will be smaller than the
RP6Libary.
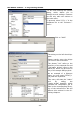
4.2. Program upload to the RP6
The RobotLoader may now be used to upload the recently compiled program to the
robot. Please add the generated hexfile to the RobotLoader's file list by clicking “Add”,
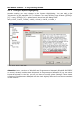
make sure the entry is selected and then click “Upload!”, just like you did with the
selftest-program. Now switch to the terminal tab and check the output. Of course, you
will have to start the program before you see any output from it. In the terminal this
is easily done by pressing [STRG]+[S] on the keyboard, by using the menu item
“Start” or by sending a “s” – of course after a reset you have to wait a second for the
“[READY]” message from the Bootloader! The key combination [STRG]+[Y] can be
used as well. After the upload has finished, the program is started straight away with
this shortcut!
The first sample program is very simple and will only start a running LED flashlight
and output some text through the serial interface.
Before you start writing your own programs, we will introduce the language C in a
mini Crash-Course...
- 60 -