
User manual


RP6 ROBOT SYSTEM - 4. Programming the RP6
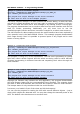
Example 1: “Hello World”-Program featuring a running LED-light
Directory: <RP6Examples>\RP6BaseExamples\Example_01_LEDs\
File: RP6Base_LEDs.c
The program will output messages on the serial interface, thus you should con-
nect the robot to your PC and watch the output in the RobotLoader Terminal!
The robot does not move in this example program! You may simply put the robot
on a table next to your PC.
This program outputs a small “Hello World” text through the serial interface and sub-
sequently executes a running light with the LEDs on the Mainboard.
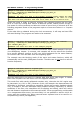
One minor detail in the running light is the “shift-left”-Operator, which has been used
in previous samples without any explanation:
1
2
3
4
setLEDs(runningLight); // Set the LEDs
runningLight <<= 1; // Next LED (shift-left Operation)
if(runningLight > 32) // Last LED?
runningLight = 1; // Yes, so, let's start again!
We will explain this operator right now. Basically a shift-left operation “<<” (see line
2), allows you to shift the Bits in a variable for a predefined number of digits to the
left. Of course you may also use the equivalent shift-right operator “>>”.
This means that runningLight <<= 1; shifts all Bits in the runningLight variable to the
left by one digit. By the way: this is just a shortcut for:
runningLight = runningLight << 1;
which works similar for += and *=.
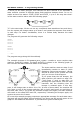
Initially the runningLight variable starts with a value of 1, which means only the Bit
number 1 is set. Each shift operation will move this Bit stepwise to the left.
Using this variable for LED control will result in a “moving” light-dot --> a running
light! In order to allow the human eye to follow the moving light dot, mSleep is used
to generate 100ms delays in between the loop cycles.
If Bit number 7 in the runningLight variable is set (which implies reaching a
value > 32), we have to return to the start by only setting Bit 1 in the variable (at
lines 3 and 4).
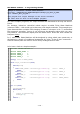
Example 2: Some more applications for the serial interface
Directory: <RP6Examples>\RP6BaseExamples\Example_02_UART_01\
File: RP6Base_SerialInterface_01.c
This program will output messages on the serial interface
The robot does not move in this example program!
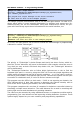
This sample program demonstrates the usage of the functions writeInteger and
writeIntegerLength, which are used to output a few integer values in different formats
through the serial interface.
Furthermore the new “timer” variable introduced in Version 1.3 of the RP6Lib is
demonstrated. It can be used for time measurements with a resolution of 100µs.
- 112 -