
Instructions Circuit Diagram


- 68 -
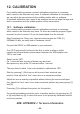
12.2. Hardware calibration
Having calibrated the servo systems, we shall now adjust the legs:
• Loosen the bolts, which are holding YETI’s “muscles” to the
legs. Take care both “muscles” may move freely inside their
sliding hole.
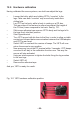
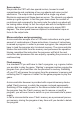
• Lay YETI on his back, while is body is resting on a CD-box.
The rear sides of his feet are to extend somewhat (the heigth of
theCD-box)lowercomparedtohisback.Seeg.12.1.
• SticksomeadhesivetapeaccrossYETI’sbodyandhislegstox
thelegsrmlyintotheirposition.
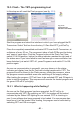
• Start Hyperterminal.
• TurnYETIaroundwithhisfacetotheoorinordertoallowavisible
contact and infrared data communication between the USB-adapter
and YETI’s rear head.
• Switch YETI on and wait for a series of beeps. The YETI will now
return the servos to zero position.
• Now press any key at the PC terminal within 3 seconds. YETI beeps
once and it will stay in the calibration function now. This way the
servos will stay activated.
• Usinganimbusspannertotightentheboltsxingthelegmuscles
to the rear legs.
• Switch YETI off.
• Remove the adhesive tape.
And yes, YETI is ready for a walk.
Fig. 12.1 YETI hardware calibration position