
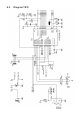
Instructions Circuit Diagram


- 17 -
5. ASSEMBLY INSTRUCTIONS ELECTRONICS
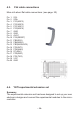
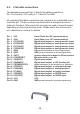
First of all please check if all parts in the kit are complete.
5.1. Soldering job
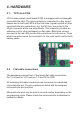
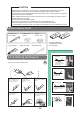
The layout on the PCB clearly shows where to mount each component.
When you want to see more detailed information, please study the
diagram, pictures and drawings for extra help and information.
When we assemble a PCB we always start with the lowest passive
components. Normally these are the resistors followed by the capaci-
tors. After soldering, cut the wire ends of the components directly, so
you always keep enough space for the soldering of the other compo-
nents on the PCB.
Before you start soldering, we always advise to insert the active com-
ponents (transistor, IC, diode) so you already can align their pins when
they do not fit properly. Often the legs of such components need some
extra bending to make them fit. At last you solder the IC sockets or the
active components.
IMPORTANT
The Elco and IC have a polarity so you should be careful to solder
them in the correct position.
WARNING
NEVER start with the soldering of an IC and when possible always use
a IC socket to avoid mistakes. When an IC is soldered, it is very dificult
to remove it again.
TIP
The IC-pins can be bend and aligned very simple on a hard flat
surface like a table! Just put all pins inline on the table and bend the IC
carefully to the correct alignment.
Technical questions see; www.arexx.com --> Forum
www.roboternetz.de --> Forum