
AZSA1500 Ares Sopwith Pup RTF Quick Start Guide


QUICK-START GUIDE
Full manual available to download from: www.Ares-RC.comFull manual available to download from: www.Ares-RC.com
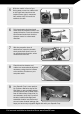
1
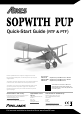
Carefully remove the transit tape
and the foam retainers, gently lift
the components from the box and
ensure you have the following:
• 100% Factory assembled
Sopwith Pup
• 70mAh 3.7V 1S Li-Po battery
• USB charger
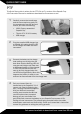
2
Plug the supplied USB charger into
a suitable port noting that the LED
on the charger will ash red when
connected.
This Quick Start guide is written for the PTF (Pair to Fly) version of the Sopwith Pup.
A full instruction manual is available to download from www.ares-rc.com
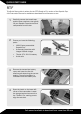
3
Connect the battery to the charge
lead making sure to align the red
dots. Note that the ashing LED will
now glow solid bright red. Note that
a discharged battery will be charged
in 30 to 50 minutes and can be
seen to be fully charged when the
red LED dims signicantly. When this
happens the battery is ready to use
and can be disconnected from the charge lead.
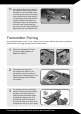
4
Pair your chosen Hitec air
transmitter to the Sopwith’s 3-in-1
control unit. Start by following the
pair / binding instructions supplied
with your Hitec air transmitter
making sure to select the Minima
receiver option when prompted.
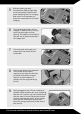
Having put your transmitter into
pair/bind mode, connect the battery to your Sopwith Pup to power it ON.
Pairing will now commence. The process being complete when the rudder
and elevator move back and forth briey. Follow your transmitter’s instruction
manual for guidance on exiting the pairing process.
PTF