ULTRA-MICRO Instruction Manual Specifications Length: Height: Main Rotor Diameter: Weight with Battery: Main Motor: Tail Motor: Battery: Transmitter: On-Board Electronics: 6.75 in (171mm) 2.8 in (71mm) 6.6 in (167mm) 1.0 oz (28g) Coreless (installed) Micro-Coreless (installed) 150mAh 1S 3.7V LiPo (included) 5-channel 2.
Table of Contents Introduction �������������������������������������������������������������������3 Safety Precautions ���������������������������������������������������������4 FCC Information �������������������������������������������������������������6 Nanos FP 75 Contents ����������������������������������������������������6 Needed to Complete ������������������������������������������������������7 Flight Checklist ���������������������������������������������������������������8 LiPo Battery Warnings �
Introduction Whether you’re looking to advance from your first CX heli or quad, or you're an experienced heli pilot looking for some flying fun around the house, the Ares (air-eez) Nanos FP 75 is the product for you. When flying in stabilized mode, the 6-axis system allows you to fly the Nanos FP 75 comfortably with control similar to that of a CX heli.
Safety Precautions Failure to use this product in the intended manner as described in the following instruction can result in damage and/or personal injury. A Radio Controlled (RC) airplane/helicopter/quadcopter is not a toy! If misused it can cause serious bodily harm and damage to property. Keep items that could become entangled in the rotor blades away from the rotor blades, including loose clothing, tools, etc.
• • • • • • Never operate your model if the voltage of the batteries in the transmitter is too low. Always operate your model in an open area away from obstacles, people, vehicles, buildings, etc. Carefully follow the directions and warnings for this and any optional support equipment (chargers, rechargeable batteries, etc.). Keep all chemicals, small parts and all electronic components out of the reach of children. Moisture causes damage to electronic components.
FCC Information This device complies with part 15 of the FCC rules. Operation is subject to the following two conditions: (1) This device may not cause harmful interference, and (2) this device must accept any interference received, including interference that may cause undesired operation. Caution: Changes or modifications not expressly approved by the party responsible for compliance could void the user’s authority to operate the equipment.
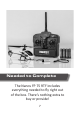
Needed to Complete The Nanos FP 75 RTF includes everything needed to fly right out of the box.
Flight Checklist PLEASE NOTE: This checklist is NOT intended to replace the content included in this instruction manual. Although it can be used as a quick start guide, we strongly suggest reading through this manual completely before proceeding.
• You must charge the LiPo battery in a safe area away from flammable materials. • Never charge the LiPo battery unattended at any time. When charging the battery you should always remain in constant observation to monitor the charging process and react immediately to any potential problems that may occur. • After flying/discharging the battery you must allow it to cool to ambient/room temperature before recharging.
• When transporting or temporarily storing the battery, the temperature range should be from approximately 40–100°F. Do not store the battery or model in a hot garage, car or direct sunlight whenever possible. If stored in a hot garage or car the battery can be damaged or even catch fire. • Do not over-discharge the LiPo battery. Discharging the LiPo battery too low can cause damage to the battery resulting in reduced power, flight duration or failure of the battery entirely.
To charge the flight battery, plug the included charge cord into the rear of the transmitter. Plug the battery into the other end of the charge cord. The LED on the front of the transmitter will light green when charging and go out when the battery is charged. Optional USB charger (AZSH2294) To charge the flight battery using the optional USB charger (AZSH2294) plug battery into USB charger and plug charger into USB port on computer. Red LED indicates charging, Green LED lights when battery is charged.
Transmitter Details The Nanos FP 75 includes a 5-channel Helicopter Transmitter with 2.4GHz technology, stability mode and digital trims. Flight Mode Switch Elevator Trim Throttle Trim (inoperative) Elevator/Aileron Control Stick Throttle/Rudder Control Stick Rudder Trim Aileron Trim (inoperative) ON/OFF Switch Transmitter Dual Rates This helicopter is equipped with a dual rate functionality, which affects maneuverability in 3-axis flight. Please note that 6-axis flight is not affected.
HIGH rate mode. To toggle the dual rate setting, unplug the helicopter and turn off the transmitter. Then, power on the transmitter and plug the battery in. Quickly move the right stick on the transmitter to bottom left corner and hold it there until the status LED blinks in a short-short-long pattern. This may take 10-20 seconds. Unplug and re-plug the battery on the helicopter, and the status LED will indicate the new rate setting.
Flight Controls In the event you are not familiar with the controls of the Nanos FP 75 please take the time to familiarize yourself with them as follows and before proceeding with your first flight: Stick UP to Ascend Stick Down to Descend The left-hand stick on the transmitter controls both the throttle (climb/descend) and rudder (yaw left/right) channels. Moving the stick up increases the speed/RPM of the rotor blades and causes the helicopter to climb.
Stick Up Forward Flight Stick Down Backward Flight The right-hand stick controls both the elevator (pitch fore/ aft) and aileron (roll) channels. Pushing the stick forward will pitch the nose of the helicopter downward, allowing it to be flown forward. Pulling the stick down pitches the nose of the helicopter upward, allowing it to be flown backwards.
Installing Flight Battery Remove the canopy from the helicopter and install the fully charged flight battery on the hook-and-loop holder with the battery wires facing the front.
Initialization To initialize the helicopter, first power on the transmitter and then plug in the battery, replace the canopy, and place the helicopter on the ground, making sure that it is not moving. The LED on the control unit will blink rapidly for three seconds to indicate that the helicopter is in bind mode. Following this, the status LED will turn off while the control unit initializes the radio connection.
be used to fine tune the neutral pitch and roll angles of the helicopter. If the helicopter has a tendency to move to the right with the cyclic stick centered, left trim should be added, and vice versa. Similarly, if the helicopter has a tendency to move forward with the cyclic stick centered, back trim should be applied. With the trim set correctly, the helicopter is capable of very stable flight with minimal drift.
Further, the cyclic trim buttons have no effect in 3-axis mode. If corrections are required in this mode, they should be made mechanically by changing the lengths of the pushrods connecting the servo horn to the swashplate. Throttle and rudder trim buttons have no effect in either flight mode. Trimming in 6-Axis If your Nanos FP75 drifts to the side or forward/backward in 6-axis flight, this drift can be eliminated by adding trim using the cyclic trim buttons on the transmitter.
Trimming in 3-Axis Please note that the helicopter must be in 3-axis mode for mechanical trim, and this trimming should never be performed with the helicopter in 6-axis mode. Any adjustments to 6-axis flight should be achieved by using the cyclic trim buttons on the transmitter. If the helicopter tends to consistently roll or pitch in a particular direction in 3-axis mode, it may be necessary to mechanically trim the helicopter to achieve optimal flight.
the same amount by twisting the plastic pieces clockwise the same number of turns. If the helicopter tends to pitch backward, the servo pushrods should be adjusted so that the swashplate leans further forward. To do this, both pushrods should be extended by the same amount by twisting the plastic pieces counterclockwise the same number of turns.
After you’ve properly trimmed the helicopter and become familiar with its handling and capabilities you may be able to fly in other smaller and less open areas too. However, it’s always more fun to fly indoors in spaces that are larger and/or more open when possible. Outdoor Flying Areas/Conditions When flying outdoors it’s best to fly the Nanos FP 75 at a local park, schoolyard or other area that’s large enough and free of people and obstructions.
Flying (General) Now that you’ve selected a suitable flying area you’re ready to fly! And when making your first flights we suggest following these steps: •With the mode switch is 6-axis mode (down) slowly raise the left-hand/throttle stick to increase the speed of the main rotor blades and until the model begins to lift off.
• While attempting to establish a low-level hover out of ground effect (approximately 20–24 inches high or higher) you can check to see if any trim adjustments are required to help keep the helicopter from constantly drifting in various directions.
inputs as minimal as possible to prevent over-controlling the helicopter. • Continue to practice until you’re comfortable hovering the helicopter at approximately 20–24 inches of altitude. Then you can transition to hovering the helicopter at higher altitudes of approximately 3–4 feet (0.9–1.2 meters). • If at any time during flight you feel like the helicopter is drifting out of/beyond your control, simply release all of the controls except for throttle.
Tx/Rx Binding/Linking Binding/linking is the process of programming the receiver to recognize the Globally Unique Identifier (GUID) code of a single specific transmitter. These steps outline the binding/ linking process of the 5-Channel Helicopter Transmitter (AZSH2281) and receiver/control unit in the Nanos FP 75 Press this button while turning on Tx Start by plugging in your fully charged battery to the 4-in-1 unit. You will notice a red blinking LED as soon as you plug in the flight battery.
Warranty, Support & Service 30-Day Limited Warranty Term Period: We warranty that the Product(s) purchased (the “Product”) will be free from defects in materials and workmanship when the product is new (before being used) for the limited warranty term period, 30 days, from the date of purchase by the Purchaser. If you believe a defect in material, workmanship, etc. was not apparent when the Product was new and only became evident after the Product was used, take the following steps.
will be returned to you at your expense. If you purchased your Product from a HobbyTown Internet site not affiliated with a local store, please consult that site for its support and service policies. You can also find more information at: www.Hobbytown.com by emailing customerservice@firelandsgroup.
Replacement Parts List Ref # Item # Description Not Shown AZSH2200 Nanos FP 75 RTF Micro Heli 18 AZSH2206 Main Board: Nanos FP 75 27 AZSH2207L Left Servo: Nanos FP 75 14 AZSH2207R Right Servo: Nanos FP 75 23 AZSH2219 Main Gear; Nanos FP 75 2 AZSH2227 Main Rotor Grip Set: Nanos FP 75 1 AZSH2229 Main Blade Set: Nanos FP 75 Not Shown AZSH2231 Complete Hardware Set: Nanos FP 75 21 AZSH2234 Landing Gear Set: Nanos FP 75 29 AZSH2238 Vertical Stabilizer: Nanos FP 75 32 AZSH2239 Tai
Exploded View 30
www.Ares-RC.