
User manual


26 User Manual
Arduino Materia 101
As well as modeling software, also for
slicing software we have available a wide
range of programs: from free and open
source ones, until those paid professional.
Between the free ones, we have selected
Slic3r as reference slicing software, for
his versatility that makes it usable by
both beginners and professional users.
SLIC3R
By Alessandro Ranellucci, it’s an open source
slicing software; it could be downloaded in
our download section on our website www.
arduino.cc/Materia101.
The suggested version is the 1.1.5 which is, at
the moment of the writing of this manual,
the latest stable version. Once you’ve
finished the download, unzip the folder and
double click the icon “Slic3r”: the program
will run without installation. We recommend
to create a shortcut on your desktop. During
the launch, the program may ask you to set
the data and the parameters of your printer:
click “cancel” and loaded the Arduino Materia
101 profiles as shown in the next paragraph..
CONFIGURING SLIC3R
As a first step, we recommend that you
switch to expert mode: from the file menu
choose “preferences” and in the drop down
menu select “expert”. To confirm the mode
you need to close and restart the program.
At this point it is necessary to define the
parameters for the printer. In order to
simplify the process we have made available
on the site, in the same download section,
the printer profile Arduino Materia 101 that
we invite you to download.
After that, choose “load config ...” from the
File menu; in the folder “profiles” that
you have already downloaded, select the file
“ArduinoMateria101.ini” and, once loaded, click
on the diskette icon adjacent to the box with
the name of the profile you just uploaded.
You must repeat the save operation for
each of the three tabs “Print Settings”,
“Filament settings” and “Printer settings”.
The profile will be available in future
sessions only after saving, otherwise it will
be available only for this session of “Slic3r”.
In the configurator file we insert all the
parameters about all the three tab so you
have a starting point already tested. If you
want to create different profiles you can
modify only one parameter and then save
the new configuration with a new name.
We recommend to you not to overwrite the
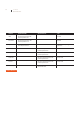
profile already supplied by Arduino. (Fig. 1).
LOADING THE MODEL
TO PRINT
In the “Plater” tab you have to click on “Add”
to your 3D model in .stl format; you can
also drag into the program from an open
folder. Slic3r will center automatically the file
without laying it on printing bed:
if your .stl file had been created not adjacent
to XY plan, your print is going to fail.
You can upload multiple STL or upload
multiple times the same STL, but
at the beginning we recommend
you to try one file at a time.
BASIC PARAMETERS
OF SLIC3R
As we’ve seen, Arduino Materia 101 allows
you (thanks to Normal and Pla profiles)
to generate a G-Code by setting only the
geometric parameters of our interest: you
can create not specific G-Code for individual
materials, leaving then set all the parameters
of temperature, fans, etc., to determine the
material to use..
Per ulteriori approfondimenti vi
rimandiamo al manuale di Slic3r
(manual.slic3r.org) e ai nostri corsi
(www.sharebot.it/academy ).
— Layer height: inside the tab “print
settings” in the menu “layers and perimeters”
you will find the entry “layer height”;
This is the height of single layer and
Fig. 1