
User manual


34 User Manual
Arduino Materia 101
EVERYDAY MAINTENANCE AND
CLEANING THE PRINTER
Arduino Materia 101 does not require any
special maintenance, but like all machinery,
efficiency is at its highest if it is kept clean.
THE PRINTING BED
The first layer of the object you print is
essential to the success of the print. For
this reason, the print bed must be perfectly
smooth with a uniform layer of hair spray
applied. After many prints, overlapping
layers of hairspray together with residue
from earlier printing might compromise
the flatness of the glass print surface,
creating irregularities. It is easy to carefully
remove this with lukewarm water and
applying a new surface of hairspray.
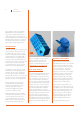
FEEDING MECHANISM
The drive gear (or sprocket) of the extruder
and its cushioned pulley tend to “eat” or
chew on the filament. For a perfect feed
of filament, it is necessary to remove
accumulated dust or other debris left
on the pulley and on the drive gear.
If you want to do a thorough cleaning,
unscrew the 4 lateral screws (those
with springs) and sweep away residue
from its bearing. After this you can
reinstall everything and run the
filament through the mechanism.
During the loading of the filament, try and
secure the wire with your fingers; if this
were to cause a “slip” of the drive gear on
the filament, the springs must be tightened
until you hear the motor losing a step
(you should hear a sound like a “tak tak
tak”). The springs should not be too tight.
Avoid putting the motor under too much
strain and consequently losing steps.
THE NOZZLE
If you want to remove plastic residue
on the tip of the nozzle; go to “Prepare”
menu and choose “Preheat”, then select
“move axis” and extrude about a half of
a finger length of material or until it pulls
the leftover material away from the tip.
Now select “cool down” and when the
temperature of the nozzle is between 100-
150°C, remove the dribble of plastic that
hangs from the nozzle with tweezers.
LUBRIFICATION
This is required only after intensive
use of the machine (or early on if it is
used in a dusty environment -strongly
discouraged!-). In any case, the machine
itself starts to ask for oil when it starts to
whine and whistle during operations
Apply a drop of sewing machine oil
or petroleum jelly on the Z, X and
Y guide rods. Spread the oil on the
whole length of the guide rod.
TENSIONING THE BELTS
A well tuned machine should have well
tensioned belts. To tighten the belts on the
y-axis, adjust the screws placed on the top
of the “shoulders”: clockwise will increase
the tension and vice versa. To tension X-axis
belts, adjust the two screws fastening the
y-engine on the right side of the machine:
first it must be loosened in order to move
the engine downwards and so increasing
the belt tension. When you have the perfect
tension, tighten the two screws firmly. To
tighten the belt for the x-axis the procedure
is similar: loosen the stepper motor’s
two screws (on the right shoulder of the
machine), move the engine to get the correct
tension and tighten the two allen screws.
A CORRECT VENTILATION
After leaving your printer on for long hours
you might notice that it is equipped with a
fan to cool the electronics. It is located on
the bottom of the machine, in the center
of the bottom plate. You should make sure
that no debris or dust obstruct this fan.
The extruder motor has a fan dedicated for
its cooling. The heat might be transferred
to the drive gear without this fan. This,
in turn, would make the drive gear
lose its grip on the filament strand.
The fan cooling the extruder motor must
always be on when the machine is in motion.
UPDATING THE FIRMWARE
Arduino Materia 101 uses open firmware
and receives frequent updates. Periodically
check our website for updates to keep
your Arduino Materia 101 up to date with
bugfixes and improvements. Instructions
on how to update the firmware is
provided along with the firmware. If your
printer is behaving strangely or does not
correspond to the behaviour mentioned
in the manual, contact our support
service and describe the problem. It might
require an update of the firmware.