
User Guide


- 4 -
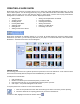
CREATING A SLIDE SHOW
Slide shows offer a great way to present photos in a fun, flashy way. When assembling a slide show, you have
lots of creative options. You can arrange photos any way you want, attach audio files to each slide, rotate and edit
photos, and even create your own "Pan & Zoom" effects. In other words, you don't need to prep photos before
adding them into a slide show. You can do it all here. Steps/options include:
• Adding Photos
• Arranging Photos
• Rotating Photos
• Inserting Blank Slides
• Attaching Audio
• Editing Photos
• Adding "Pan & Zoom" Effects
• Setting The Chapter Button Thumbnail
• Including Transitions
• Creating A Soundtrack
• Setting The Duration
• Naming Your Slide Show
• Previewing Your Work
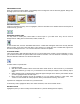
Slide shows will appear as separate chapters on your DVD. By double-clicking the respective chapter button
thumbnail on your menu, you can edit any slide show in your project. To create a slide show, click "Create New
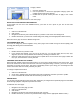
Slide Show." The Slide Show Creator screen will appear.
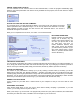
ADDING PHOTOS
The first thing you'll need to do is grab the photos that you'd like to use for the slide show. You'll notice that most
of the buttons are initially dimmed; they'll become available after you add some pics.
To add photos to a slide show:
1. Click "Add Photos."
2. Browse to the directory that contains the photos you want to add.
3. Hold down the CTRL key on your keyboard and click the photos you want.
4. Click "Open." Your photos will appear on the screen.
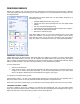
To acquire photos from a scanner or other connected device:
1. Click the "Acquire Photos" button and choose the type of device from which you'll be capturing.
2. Follow the directions for acquiring photos from your device manufacturer.
To remove a slide, highlight it and click the "Delete" button: