
User Guide


- 12 -
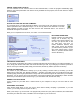
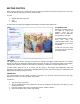
PRODUCING YOUR MOVIE
When you're finished adding, arranging, and customizing your movie content,
go to the Produce screen (click on the big number "3" at the top of the
screen). Here you can burn your DVD/VCD.
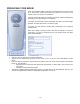
A remote control will appear on the side. The buttons will be a little different
depending on the type of project you're making.
For DVDs, use the arrows to select the chapter from which you wish to begin
playback, and then press "Enter." Hit "Enter" to play.
For VCDs, you can press the number that corresponds to the respective
chapter button.
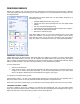
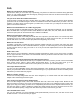
When you're ready to create your disc, click "Burn to DVD Disc" (or "Burn to
VCD Disc"). You may be prompted to save your project before the "Write
Disc" window appears:
• Type in a name for your disc in the "Disc Label" field.
• Choose the TV standard that you'd like to use: NTSC or PAL. If you're in the United States, choose
NTSC.
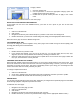
• From the "Write to" pull-down, choose where you'd like to save your movie. Choose either your DVD/CD
burner, or your hard drive.
o DVD/CD burner: Choose the write speed from the pull-down. In some cases, "Auto" may be your
only option.
o Hard drive: Choose the save location.
• The bottom checkbox allows the still images used in your slide show to be burned/saved. This way, you
can see the original files in addition to seeing them presented in your movie.