
User Guide


Collage Creator Quick Start Guide
- 13 -
Collage Creator Walk-Through – Saving Collage Pieces
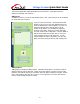
Your collage projects can be saved as either “projects” or “images.”
Project Files
Project files are files that are exclusive to the program. These files retain each individual
component of your collage and allow you to edit each piece at any time.
Image Files
These are your standard “regular” photo files. Your collage can be saved as a single-layer, “flat”
image.
Save as a project file if you want to be able to edit your collage at a later time. You’ll want to
use this option if you have to stop working on your project, or if you feel that you may need to
fix or change parts of it at another time.
Save as a standard image file if you would like to email your collage to friends or family. They
won’t be able to read project files.
Collage Creator Walk-Through – Saving Collage Pieces
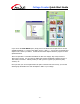
Printing images is a snap. The preview that you see is exactly how the page will print. Here’re
the essential details:
Adjusting the Print Size
You can do this one of two ways:
1. Use the slider at the bottom of the print options section. As you click and drag the slider,
you’ll notice the collage get larger or smaller on the page. You’ll see the width, height
and DPI just above the slider. For the best results, print at 200 DPI or higher.
2. Click and drag the corner handles of the collage directly on the preview page.
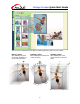
Moving Your Print
Click and drag your collage on the preview to move it around the page.
Setting the Print Orientation
Click the desired orientation button. You can print in either portrait or landscape format.
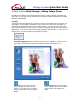
Choosing the Print Layout
You can print your collage on one page, or across several pages. Pick the format you want by
clicking on the corresponding bubble.
Printing Multiple Copies
Type in the number of copies you want printed, or use the + and – buttons to alter the amount.