
User's Manual
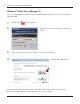
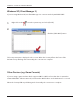
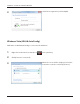
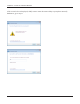
Table Of Contents
- Chapter 1 - Product Overview
- Chapter 2 - Placing Your AirStation
- Chapter 3 - Installation
- Chapter 4 - Configuration
- Chapter 5 - Connect to a Wireless Network
- Chapter 6 - Trouble Shooting
- Appendix A - Specifications
- Appendix B - Default Configuration Settings
- Appendix C - Network-USB Navigator
- Appendix D - TCP/IP Settings
- Appendix E - Restoring the Default Configuration
- Appendix F - Shared Folders and the USB Port
- Appendix G - Regulatory Compliance Information
- Appendix H - Environmental Information
- Appendix I - GPL Information
- Appendix J - Warranty Information

WBMR-HP-G300H User Manual 96
Chapter 5 Connect to a Wireless Network
2
Windows XP (Client Manager 3)
If you are using Windows XP, use Client Manager 3 to connect wirelessly with AOSS/WPS.
1
Right click on the icon in the system tray, and select [Pro le].
Click the [WPS AOSS] button.
Follow any instructions displayed on the screen. When the Security LED on the front of the
AirStation stops ashing and is lit steadily, the connection is complete.
Other Devices (e.g. Game Console)
If you are using a game machine which supports AOSS or WPS, refer to that device’s manual to
initiate AOSS/WPS. When instructed, hold down the AOSS button on the AirStation for 1 second.
When the Security LED stops blinking and is lit steadily, the connection is complete.