Industrial radio remote control system FLEX12EPH FLEX8EPH Instruction Manual
Service Information Your New Radio Remote Control System Thank you for your purchase of ARC Flex 12EPH/8EPH radio remote control system. Without a doubt, our Flex 12EPH/8EPH system is the ultimate solution for providing precise, undeterred, and safe control of your material. If your product ever needs modification or service, please contact our representative in your country or at the following location: World Headquarter: Advanced Radiotech Corporation No.
PRODUCT MANUAL SAFETY INFORMATION Advanced Radiotech Corporation (ARC) offers a broad range of radio remote control product for material handling applications. This manual has been prepared by ARC to provide information and recommendations for the installation, use, operation and service of ARC’s material handling products and systems (ARC Products).
could void the authority to operate equipment. This device and its antenna must not be co-located or operating in conjunction with any other antenna or transmitter. ⚫ End-users and installers must be provided with antenna installation instructions and transmitter operating conditions for satisfying RF exposure compliance. ⚫ For product available in the USA/Canada market, only channel 1~141 can be operated.
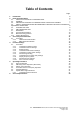
Table of Contents Page 1. 2. 3. 4. 5. 6. Introduction 5 Radio Controlled Safety 6 2.1. CRITICAL INSTALLATION CONSIDERATIONS 7 2.2. GENERAL 7 2.3. PERSONS AUTHORIZED TO OPERATE RADIO CONTROLLED CRANES 7 2.4. SAFETY INFORMATION AND RECOMMENDED TRAINING FOR RADIO CONTROLLED EQUIPMENT OPERATORS 8 2.5. TRANSMITTER UNIT 9 2.6. PRE-OPERATION TEST 9 2.7. BATTERIES 9 2.8. Used symbol description 10 2.9. Method cleaning products 10 2.10. Product Maintenance 10 General System Information 11 3.1. Transmitter 11 3.
1. Introduction The Flex 12EPH/8EPH radio remote control systems are designed for control of industrial equipment and machinery such as overhead traveling cranes, jib cranes, gantry cranes, tower cranes, electric hoists, winches, monorails, conveyor belts, mining equipment, and all other material handling equipment where wireless control is preferred. Each Flex 12EPH/8EPH system consists of a transmitter handset and a receiver unit.
2. Radio Controlled Safety WARNINGS and CAUTIONS Throughout this document WARNING and CAUTION statements have been deliberately placed to highlight items critical to the protection of personnel and equipment. WARNING – A warning highlights an essential operating or maintenance procedure, practice, etc. which if not strictly observed, could result in injury or death of personnel, or long term physical hazards.
2.1. CRITICAL INSTALLATION CONSIDERATIONS WARNING PRIOR TO INSTALLATION AND OPERATION OF THIS EQUIPMENT, READ AND DEVELOP AN UNDERSTANDING OF THE CONTENTS OF THIS MANUAL AND THE OPERATION MANUAL OF THE EQUIPMENT OR DEVICE TO WHICH THIS EQUIPMENT WILL BE INTERFACED. FAILURE TO FOLLOW THIS WARNING COULD RESULT IN SERIOUS INJURY OR DEATH AND DAMAGE TO EQUIPMENT.
2.4. SAFETY INFORMATION AND RECOMMENDED TRAINING FOR RADIO CONTROLLED EQUIPMENT OPERATORS Anyone being trained to operate radio controlled equipment should possess as a minimum the following knowledge and skills before using the radio controlled equipment.
• change any settings or controls without authorization and proper training • remove or obscure any warning or safety labels or tags • leave any load unattended while lifted • leave power on the radio controlled equipment when the equipment is not in operation • operate any material handling equipment using a damaged controller because the unit may be unsafe • operate manual motions with other than manual power • operate radio controlled equipment when low battery indicator is on WARNING THE O
2.8. Used symbol description danger electric shock risk Equipment Recycling: The production and operation of this equipment requires the recycling and utilization of natural resources. If the product is not processed properly when it is scrapped, this device may contain There are substances that are harmful to the environment or human health.
3. General System Information 3.1. Transmitter 3.1.1. 12EPH External Illustration 1. 2. 3. 4. 5. 6. 7. 8. 9. 10. STOP Button Power Key Switch Status LED Indicator Pushbutton 1 (PB1) Pushbutton 2 (PB2) Pushbutton 3 (PB3) Pushbutton 4 (PB4) Pushbutton 5 (PB5) Pushbutton 6 (PB6) Pushbutton 7 (PB7) 11. 12. 13. 14. 15. 16. 17. 18. 19.
3.1.2. 8EPH External Illustration 1. 2. 3. 4. 5. 6. 7. 8. STOP Button Power Key Switch Status LED Indicator Pushbutton 1 (PB1) Pushbutton 2 (PB2) Pushbutton 3 (PB3) Pushbutton 4 (PB4) Pushbutton 5 (PB5) Flex 9. 10. 11. 12. 13. 14. 15.
4. Function Settings 4.1. Transmitter 4.1.1. Transmitter Firmware Version 1) Rotate the power switch key to OFF ( 0 ) position. 2) With the STOP button elevated, press and hold PB1 and PB3 at the same time. 3) Rotate the power switch key to ON ( I ) position. 4) Let go PB1 and PB3 at the same time. The Status LED displays firmware version with red, green and orange blinks. 5) Exit Firmware Version mode by rotate the power switch key to OFF ( 0 ) position. 4.1.2. Transmitter Channel Settings A.
B. Assigned Channel Scheme (preset system channel) Both transmitter and receiver is assigned with a matching preset channel (channel 01~62). Pitch & Catch, t-type, and multi-receiver configurations must set to assigned channel scheme. 1) Rotate the power switch key to OFF ( 0 ) position. 2) With the STOP button elevated, press and hold PB1 and PB2 at the same time. 3) Rotate the power switch key to ON ( I ) position. 4) Let go PB1 and PB2 at the same time (entered Channel Setting mode).
4.1.3. Remote Pairing A. Transmitter-to-Transmitter Pairing: 1) Rotate the power switch key to OFF ( 0 ) position. 2) With the STOP button elevated, press and hold PB1 and PB3 at the same time. 3) Rotate the power switch key to ON ( I ) position. 4) Let go PB1 and PB3 at the same time (entered Remote Pairing mode). The Status LED displays firmware version with red, green and orange blinks. 5) Output data (original transmitter) by press and hold PB2 (Status LED off).
4.1.4. Transmitter Start Function Settings When transmitter goes into sleep mode the system is temporarily deactivated (MAIN output opened). Execute the START command or press any pushbutton to wake up the system (MAIN output closed). Dipswitch Settings Function 1 xxxxxxxxx0 START Reactivation 2 xxxxxxxxx1 Any Button Reactivation 4.1.5. Transmitter Inactivity Timer Settings Set how long the transmitter enters the sleep mode when not in use (pushbutton not pressed).
4.1.6. Infrared Programming Other custom functions and settings not listed in this manual can be programmed via the infrared IR programmer unit, such as the system serial number, frequency range, TAC, status feedback, new and updated functions, and many others. Please contact ARC representative for more details. 4.1.7. Transmitter Access Card (TAC) Settings Follow the instruction below on how to program the TAC into the transmitter. The infrared IR programmer unit is required to complete the programming.
4.1.8. Display Frequency Band 1) Rotate the power switch key to OFF ( 0 ) position. 2) With the STOP button elevated, press and hold PB2 and PB4 at the same time. 3) Rotate the power switch key to ON ( I ) position. 4) Let go PB2 and PB4 at the same time (entered Frequency Band Display mode). 5) The Status LED displays the preset transmitter frequency band with orange, green and red blinks.
5. Operating Procedures 5.1. General Operation a. Reset the STOP button located on the top left hand corner of the transmitter by rotating it clockwise or counter clockwise, the button will pop up. Turn on the transmitter power by inserting the power switch key and rotate to ON ( I ) position. → b. After turning on the transmitter power, check the Status LED on the transmitter for any sign of system irregularities (refer to section 6.10.1 Transmitter Status Indications).
e. After 1 minute or 5 minutes of inactivity (pushbutton not pressed) the receiver MAIN output are temporarily disconnected (refer to section 4.1.5 Inactivity Timer Settings). Press any pushbutton or execute the START command to resume operation (refer to section 4.1.4 Start Function Settings). The receiver MAIN output are also temporarily disconnected when the system encounters strong radio interference, dead spots, low battery condition, and system out of operating range. f.
5.5. Changing Batteries Changing transmitter batteries (“AA” alkaline battery x 2) by unscrewing the battery cover located on the backside of the transmitter. During battery installation make sure the batteries are installed correctly, with “+” to “+” charge and “–” to “–” charge. Also make sure the screw is tightened after battery installation to avoid water, moisture, dirt, grease, and other liquid penetration. 5.6. System Status Light Indications 5.6.1.
4 4 red blinks followed by a 2-second pause Transmitter is unable to lock onto the assigned channel 5 Constant green for up to 2 seconds Transmitter power on with no faults detected 6 Blinking green Transmission in progress 7 2 orange blinks followed by a 2-second pause Receiver MAIN output jammed or defective 8 3 orange blinks followed by a 2-second pause Decoding processors defective 9 Blinking orange Pressing any pushbutton prior to executing the START command at power on Flex 12EPH/8E
6. General Specifications Frequency Range : 433MHz ~ 440MHz (FCC) 863MHz ~ 870MHz (CE) Number of Channels : 141 channels(FCC)/62 channels(CE) Channel Spacing : 50K(FCC) / 100 KHz(CE) Modulation : Digital Frequency Modulation based on Manchester Code, 20bit address, 32bit CRC and Hamming Code.