
Installation Manual


5 Testing & Troubleshooting
18
5.1 Leak Testing
F With the vehicle parked and the engine off, turn the compressor on and wait until the air
system is fully charged.
F The compressor should not come on again for a period of at least 15min. Air system
recharging within that time period would indicate that a leak is present in the system.
F If a leak is found to be present, spray a soap and water mixture onto all air fittings in the
system while the compressor is fully charged. Bubbles should appear at any leak points.
F Check that leaky fittings have been adequately tightened.
F If leaking persists then disassemble fittings, clean threads, and reapply thread sealant /
tape.
5.2 Testing the Air Locker Actuation (Air Locker Systems Only)
To test that the air system, electrical system, and the Air Locker differential is functioning
correctly:
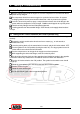
F Support the vehicle such that the wheels are free to rotate (e.g., on axle stands, a
chassis hoist, etc.)
F Leave the parking brake off, the transmission in neutral, and the Air Locker switch ‘OFF’.
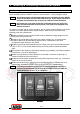
F Turn the ignition to the ‘ON’ position (leaving the motor off). The large symbol on the Air
Locker switch cover should not be illuminated.
F Turn the compressor on to charge the air supply to maximum pressure.
F While supporting the drive shaft flange, rotate one wheel by hand.
F The wheel should rotate freely and the opposite wheel should be turning in the opposite
direction without any resistance or mechanical noise from within the differential.
F Turn the Air Locker switch to the ‘ON’ position. The symbol on the switch cover should
light up.
F Rotate the same wheel again and check that both wheel rotate together.
F Turn the switch off again.
F Rotate the same wheel again.
F The wheels should again rotate in opposite directions.