
Transmitter-PLC User Manual
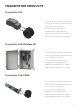


RSD-S-PLC INSTALLATION
INSTALLATION NOTES
Installation MUST comply with local regulations and technical rules:
① Perform all electrical installations in accordance with local codes.
② Be aware that only qualified professionals should install and/or replace the RSD-S-PLC.
③ Before installing or using an RSD-S-PLC, please read all instructions and warnings in the technical
documents and on the inverter system itself as well as on the PV array.
④ Be aware that installation of this equipment includes the risk of electric shock.
⑤ Do not touch any live parts in the system, including the PV array, when the system has been
connected to the electrical grid.
⑥ Ensure the solar module and inverter has been disconnected before installing an RSD-S-PLC.
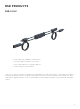
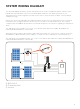
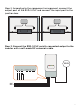
Additional installation components from APsystems
Required parts and tools to complete the installation
· DC extension cable (sold separately)
In addition to your PV array and its associated hardware, you will need the following items:
· Rapid shutdown device installation kit (screw, nut)
· A torque wrench and a Phillips screwdriver
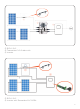
① Be sure to verify the voltage and current specifications of your PV module match with those of
the RSD-S-PLC.
② You must match the DC operating voltage range of the PV module with the allowable inpust
voltage range of the RSD-S-PLC.
③ The maximum open circuit voltage of the PV module must not exceed the specified maximum
input voltage of the APsystem RSD-S-PLC.
6