
Instruction Manual


9
www.apricorn.com
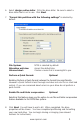
6. Select
Assign a drive letter
. Fill in the drive letter. Be sure to select a
drive letter that is not in use. Click
Next
.
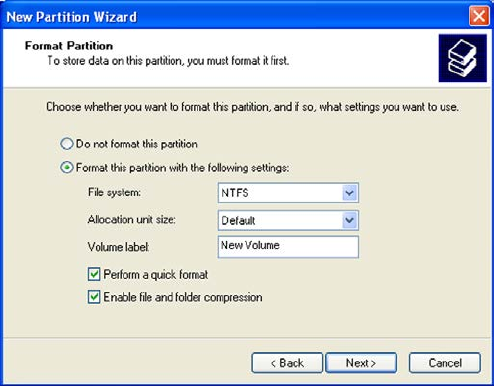
7. “Format this partition with the following settings” is selected by
default.
File System: NTFS is selected by default.
Allocation unit size: Accept the default size.
Volume Label: Choose a name that is meaningful to you.
Perform a Quick Format: Optional
Enabling Perform a Quick Format reduces the format time signicantly.
However a Quick Format is less thorough and does not scan for or mark bad
sectors. If you are concerned about errors on your drive do not perform a
quick format.
Enable le and folder compression: Optional
Selecting this feature gives you the option to use le and folder compression
feature available to the NTFS les system.
8. Click
Next
. You will have to wait a bit. When completed, the drive
properties will be shown. You have completed partitioning and formatting
your new hard drive. You can begin cloning or imaging (see relevant
sections for instructions).