
System information


62 Chapter 5 Managing Users
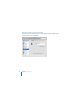
5 Enter the user’s password in the Password and Verify fields.
You can use Password Assistant to help you choose a new password. Click the Key
button to the right of the Password field to see how secure the new password is.
6 Select “Allow user to administer this computer” if this user account needs to create
other user accounts, create groups, install software on the server, or change server
settings.
Importing Users
If your server is connected to your organization’s directory server, you can import users’
existing accounts. Your server gives each imported user account a separate iChat
address and personal calendar. Imported user accounts can also have access to the
server’s shared files and shared websites. If your server’s mail service and VPN service
are turned on, imported user accounts get email addresses and can use VPN to access
the server remotely. Access to each service is subject to the service being turned on,
and you can separately control each imported user account’s access to services.
To import a user account:
1 Before importing a user account, be sure the invitation email is worded to suit your
needs.
For information, see “Customizing the Server Invitation Email” on page 75.
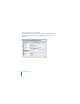
2 In the Users pane of Server Preferences, click the Add (+) button and choose “Import
User From Directory” from the pop-up menu.
If you don’t see a pop-up menu when you click Add (+), your server isn’t connected to
a directory server in your organization. See “Connecting to a Directory Server” on
page 135.