
System information


Chapter 2 Installing Mac OS X Server 39
For servers that Server Assistant finds on the local network (IP subnet), the IP address
may be assigned automatically by a DHCP server on the network. If no DHCP server
exists, the target server uses a 169.254.xxx.xxx address unique among servers on the
local network. Later, when you set up the server, you can change the IP address.
If the server you want isn’t listed, you can click Refresh List to have Server Assistant look
again for servers that are ready for installation on your local network. If the server you
want is on a different local network, choose “Server at IP Address” from the “Install to”
pop-up menu, and enter an IP address in IPv4 format (for example, 192.0.2.200). You
can also choose “Server at DNS Name” and enter the server’s DNS name.
5 When prompted for a password, type the first 8 characters of the server’s built-in
hardware serial number.
To find the serial number, look for a label on the server. Match the capitalization of the
serial number when you type it.
For a computer that has no built-in hardware serial number, use 12345678 as the
password.
6 Proceed through the Install Language, Important Info, and Software License panes,
following the onscreen instructions.
For information about settings in a Server Assistant pane, click the Help button in the
pane.
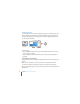
7 In the Volumes pane, select a target disk or partition, make sure it’s in the expected
state, and click Continue.
For information about the disk status icons, click the Help button in the Volumes pane.