
System information


8
Chapter 1
Installing the RAID Admin Application
You must install RAID Admin on all computers that you want to use to monitor or administer
Xserve RAID systems. Each monitoring computer must be using Java 1.3.1 or a more recent
version. (Java 1.3.1 is supported in Mac OS X v10.2 and later versions.)
To install RAID Admin on a monitoring computer:
m
Insert the Xserve RAID Admin Tools disc in the optical drive of the monitoring computer
and copy the folder “RAID Admin” to that computer.
You can also copy the software folder from a remote system or server if the computer you
want to use for monitoring does not have an optical drive.
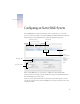
Connecting to the System
RAID Admin uses Rendezvous discovery to simplify connecting to an Xserve RAID system the
first time. The application lists the IP address of the systems on the same subnet as your
monitoring computer.
The system’s default configuration is to use DHCP for a network address. If no DHCP server
is available, the system will automatically use a link local address of 169.254.x.x.
To connect to a system:
1
Turn on the Xserve RAID system.
Note:
The first time you turn on the system, the RAID controllers begin initializing the
drives in the system. This process will take several hours; for example, an array with seven
drives takes a minimum of 12 hours to initialize. You can use the default RAID Level 5 array
(or arrays, depending on the number of drives in the system) immediately (as the drives
are initializing) or stop initialization by connecting to the system and deleting the arrays that
are set up at the factory. Connecting during initialization and deleting an array will not harm
the system. If you have written any data on an array, deleting that array will cause that data
to be lost.
Important
The first time you configure an Xserve RAID system, you must use RAID Admin
on a computer that is on the same subnet as the system. By doing so, you can connect to the
system without knowing the IP address of the system.