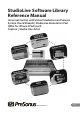
StudioLive Software Library Reference Manual ™ Universal Control with Virtual StudioLive and Smaart System Check Wizards | StudioLive Remote for iPad QMix for iPhone /iPod touch Capture | Studio One Artist ® ® ™ ® ™ ® ® ® www.presonus.
Table of Contents 3.3.3 Copying Mixes — 26 3.3.4 Copying Channel Settings — 26 3.3.5 GEQ in Focus (24.4.2 and 16.4.2 only) — 27 1 Overview — 1 1.1 Introduction — 1 1.2 About This Manual — 1 3.4 VSL: Fat Channel Tab — 27 1.3 Summary of Virtual StudioLive Features — 2 3.5 Loading Scenes and Presets from VSL — 28 1.4 Summary of StudioLive Remote for Apple iPad Features — 3 3.5.1 Loading a Scene — 28 3.5.
.8 Smaart System Check Wizards (StudioLive 16.4.2 and 24.4.2 only) — 41 3.8.1 Smaart Room Analysis Wizard — 43 3.8.2 Smaart System Delay Wizard — 47 3.8.3 Smaart Output Check Wizard — 51 3.8.4 Go Remote — 52 3.8.5 Mic Position — 53 3.8.6 System Alignment Rules — 55 3.8.7 Using the Trace: Spotting the Trend — 56 5 QMix for iPhone and iPod touch — 74 5.1 Networking your iPhone or iPod touch and Computer — 74 5.1.1 Step 1: Creating an Ad Hoc Network on your Computer — 74 5.1.
6.7 Importing Audio Files — 94 6.7.1 Preview Player — 95 8 Troubleshooting — 141 8.1 Universal Control: Driver and General Connectivity — 141 6.8 Export Audio Files — 95 6.9 Capture Key Commands — 97 8.2 Universal Control: VSL — 142 7 Studio One Artist Quick Start — 98 8.3 StudioLive Remote — 142 7.1 Installation and Authorization — 98 8.4 QMix — 142 8.5 Troubleshooting your iPad Ad Hoc Network — 143 8.6 Troubleshooting your iPhone Ad Hoc Network — 143 7.2 7.3 7.4 7.1.
1 1.1 Overview Introduction 1 Overview 1.1 Introduction StudioLive™ Software Library Reference Manual Your StudioLive™-series mixer comes with a powerful Software Library that includes Universal Control with Virtual StudioLive (VSL), Capture™, and Studio One® Artist. In addition, PreSonus offers StudioLive Remote (SL Remote) for iPad® and QMix™ for iPhone®/iPod touch® , both of which are free downloads from the Apple App Store.
1 1.3 Overview Summary of Virtual StudioLive Features 1.3 Summary of Virtual StudioLive Features StudioLive™ Software Library Reference Manual The Virtual StudioLive (VSL) application is completely integrated with your StudioLive mixer. VSL is a highly advanced editor/librarian and control panel. Because of the continuous bidirectional communication between your StudioLive and VSL, whatever you do on the StudioLive‘s control surface will be reflected in VSL and vice versa.
1 1.4 Overview Summary of StudioLive Remote for Apple iPad Features 1.4 Summary of StudioLive Remote for Apple iPad Features StudioLive™ Software Library Reference Manual StudioLive Remote (SL Remote) for iPad provides direct wireless control over PreSonus Virtual StudioLive software for Mac® and Windows®, which in turn controls any StudioLive-series digital mixer. As long as you have a wireless connection between your iPad and a computer running VSL, SL Remote can control the console.
1 1.6 Overview Summary of Capture Features 1.6 Summary of Capture Features StudioLive™ Software Library Reference Manual Included with StudioLive is Capture, a digital-audio multitrack-recording application designed to make recording quick and easy. Perfect for live recording and for mixing your audio in real time to a stereo audio file, Capture was designed to interface perfectly with StudioLive-series mixers, allowing instant setup and recording. For StudioLive 16.4.2 and 24.4.
StudioLive™ Software Library Reference Manual 2 2.1 Connecting to a Computer Installation for Windows 2 Connecting to a Computer The speed of your processor, amount of RAM, and capacity, size, and speed of your hard drives will greatly affect the overall performance of your recording system. A faster processor and more RAM can reduce signal latency (delay) and improve overall performance. Please visit www.presonus.com for the latest system requirements and updated list of compatible hardware.
2 2.2 Connecting to a Computer Installation for Mac OS X 2.2 Installation for Mac OS X StudioLive™ Software Library Reference Manual The Universal Control Installer will take you through each step of the installation process. Please read each message carefully, and be especially careful that you do not connect your StudioLive too soon. 1. After launching the installer, you will be directed to the Welcome screen. 2. Click “Continue” and follow the onscreen instructions. 3.
2 2.3 Connecting to a Computer Using the StudioLive as an Audio Interface 2.3 Using the StudioLive as an Audio Interface StudioLive™ Software Library Reference Manual The StudioLive features a built-in FireWire interface that can be used with any application that supports Core Audio or ASIO and can also be used as a WDM device for a Windows computer. For StudioLive 16.4.2 and 24.4.2 users, any input and bus with a Select button, plus the Solo bus, tape input, and talkback mic, can be recorded.
2 2.4 Connecting to a Computer Using the StudioLive with Popular Audio Applications StudioLive™ Software Library Reference Manual Apple Logic Pro/Express 7+: 1. Launch Logic Pro/Express. 2. Go to Logic | Preferences | Audio. 3. Click on the Devices Tab. 4. On the Core Audio tab, check Enabled. 5. Select PreSonus FireStudio from the device menu. 6. You will be asked if you’d like to relaunch Logic. Click “try (re)launch.” 7. Your StudioLive features custom I/O labels for faster work flow.
2 2.5 Connecting to a Computer FireWire Sends and Returns 2.5 FireWire Sends and Returns StudioLive™ Software Library Reference Manual When using the StudioLive as an audio interface, it is important to understand the terms “FireWire send” and “FireWire return.” Because the audio interface in the StudioLive is completely integrated with the other functions of the mixer, the FireWire I/O is designed to work as an independent bus.
2 2.5 Connecting to a Computer FireWire Sends and Returns StudioLive™ Software Library Reference Manual Power User Tip: Note that either channel of the stereo pair can still be accessed on a mono track in your host application; only the routing must be assigned as a stereo pair. For instance, if you have a backing-vocal group routed to Subgroup 1 and a guitar group routed to Subgroup 2, you would create two mono tracks in your recording application.
2 2.6 Connecting to a Computer Using Plug-In Effects as Inserts StudioLive™ Software Library Reference Manual 2.5.4 Main FireWire Return To provide the most flexible mixing environment, the main mix output for any application should be assigned to the Main FireWire Return. These FireWire returns are hard-coded to the FireWire Return buttons in the 2 Track In (StudioLive 16.4.2 and 24.4.2 only) and Monitor sections of the StudioLive.
2 2.7 Connecting to a Computer Printing Fat Channel Dynamics and EQ StudioLive™ Software Library Reference Manual 4. Press the FireWire Return button on Channel 4 of your StudioLive. You can now monitor the analog signal from Channel 4 on your StudioLive with your inserted effect (in this case, Beat Delay). Power User Tip: When using plug-ins as inserts, it is very important that you set as low a buffer size on your computer as possible without creating performance issues.
2 2.7 StudioLive™ Software Library Reference Manual Connecting to a Computer Printing Fat Channel Dynamics and EQ 4. Press the Link button in the Fat Channel to stereo-link Channels 3 and 4. Link 5. Press and hold the SIP button. SIP 6. Solo Channel 3-4. You will notice that all other channels have muted. 1 2 3 4 Select Select Select Select Select Solo Solo Solo Solo Mute Solo Mute Mute LOOP L LooP R Mute Keys R Keys L Tom 2 High Hat OH Left OH Right 7.
2 2.7 Connecting to a Computer Printing Fat Channel Dynamics and EQ StudioLive™ Software Library Reference Manual 9. StudioLive 16.4.2 and 24.4.2 owners: In VSL, patch Main L/R to Auxiliary FireWire Returns 31 and 32. StudioLive 16.0.2 owners: In VSL, patch Main L/R to the Flexible Inputs. 10. In Studio One, create a new stereo audio track (see section 7.4 for more information). 11. In Studio One, select StudioLive Auxiliary FireWire Sends 31 and 32 (24.4.2 and 16.4.
2 2.8 Connecting to a Computer Configuring the StudioLive For Core Audio (Mac Only) 2.8 Configuring the StudioLive For Core Audio (Mac Only) StudioLive™ Software Library Reference Manual Your StudioLive can be used as the main Core Audio device for a Mac, and you can route the main outputs of your Mac to any of its available output streams. By default, these streams are routed to Channels 1 and 2 on your StudioLive. For StudioLive 16.4.2 and 24.4.
2 2.8 Connecting to a Computer Configuring the StudioLive For Core Audio (Mac Only) 5. Choose 2TrackIn L for the left speaker. Choose 2TrackIn R for the right speaker. 6. When you are finished, click Apply and then Done.
2 2.8 Connecting to a Computer Configuring the StudioLive For Core Audio (Mac Only) StudioLive™ Software Library Reference Manual 7. Next you will set up your StudioLive as the main output device for your Mac. Launch System Preferences. 8. Open the Sound Preferences. 9. Click on the Output tab and select PreSonus FireStudio.
3 3.1 Universal Control and VSL Universal Control Launch Window 3 Universal Control and VSL StudioLive™ Software Library Reference Manual Universal Control includes two windows: the Launcher window and the Device window. For the StudioLive, the Device window is the Virtual StudioLive (VSL) application. VSL provides bidirectional control of channel, subgroup (16.4.2 and 24.4.2), aux, and main-bus levels; Fat Channel parameters; aux mixes; effects; and the graphic EQs.
3 3.1 Universal Control and VSL Universal Control Launch Window StudioLive™ Software Library Reference Manual Operation Mode. Changes How the StudioLive Driver’s Buffer Size is Set. •• Low Latency. Input and Output buffers are both identical to the Buffer Size setting. •• Normal Mode. Slightly increases the Output buffer for typical operation. •• Safe Mode 1-2. Increases the output buffer size for added stability. Buffer Size Selector (Windows Only). Changes the StudioLive Buffer Size.
3 3.1 Universal Control and VSL Universal Control Launch Window StudioLive™ Software Library Reference Manual Settings: Run at Startup. Launches the Universal Control Application Automatically on Startup (Windows Only). When this is enabled, the Universal Control application will automatically launch each time you boot your Windows PC. On the Mac, you can set this up first by dragging Universal Control to your dock, then by Option-clicking it and selecting Options>Open at Login. Settings: Always on Top.
3 3.1 Universal Control and VSL Universal Control Launch Window StudioLive™ Software Library Reference Manual 3.1.1 Advanced WDM Features (Windows Only) Like the FireStudio-family interfaces, the StudioLive features advanced WDM features to enhance its use as an audio interface. In the upper left-hand corner of the Universal Control Launcher window, you will find the Settings menu. From here, you can configure your WDM input and output streams.
3 3.1 Universal Control and VSL Universal Control Launch Window StudioLive™ Software Library Reference Manual 3. Click on WDM 1 (front left) and drag it down to place it next to StudioLive 2 Track In Left. 4. Click on WDM 2 (front right) and drag it down to place it next to StudioLive 2 Track In Right. 5. Your stereo WDM playback will now be routed directly to the main FireWire Return buttons in the 2 Track In and Monitor buses in the StudioLive Master Section.
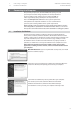
3 3.2 Universal Control and VSL VSL: Browser 3.2 VSL: Browser StudioLive™ Software Library Reference Manual When you first launch VSL, notice the Browser window along the right side of the screen. The browser in VSL functions similarly to the browser in Studio One. From the browser, you can see all of the Scenes, Fat Channel presets, FX presets, and graphic EQ settings that are saved on your StudioLive and on your computer.
3 3.2 StudioLive™ Software Library Reference Manual Universal Control and VSL VSL: Browser Browser Tab Buttons. Displays the Different Preset Categories on Your StudioLive and on Your Computer. All of your Scenes and presets are contained in dedicated folders in VSL. To view a specific set of presets, simply click on its tab. •• SCENE. Displays stored Scenes. •• FAT CH. Displays stored Fat Channel presets. •• FX. Displays stored effects presets. •• GEQ. Displays graphic EQ presets. •• BACKUP.
3 3.3 Universal Control and VSL VSL: Overview Tab 3.3 VSL: Overview Tab StudioLive™ Software Library Reference Manual At the top of the VSL window, you will see four tabs: Overview, Fat Channel, GEQ, and Setup. The Overview tab provides you with a complete graphical representation of your StudioLive. As you adjust parameters on the StudioLive, you will notice that the VSL overview is also updated. If you use your mouse to adjust a parameter in VSL, the StudioLive will be updated remotely.
3 3.3 StudioLive™ Software Library Reference Manual Universal Control and VSL VSL: Overview Tab The Masters view displays the controls for each aux output and FX bus as they appear on the StudioLive and displays a scribble strip to give each aux a custom name. From within the Masters view, you can also select each aux and FX bus to edit its Fat Channel insert. For StudioLive 16.4.2 and 24.4.
3 3.4 Universal Control and VSL VSL: Fat Channel Tab StudioLive™ Software Library Reference Manual Copy Channel (Drag-and-Drop) At the top of the VSL window, you will see the Copy Channel handle. This handle follows the selected channel and lets you drag-and-drop all the Fat Channel and bus assignments for that channel onto another channel or bus. Note: Channel bus assignments are only copied from channel to channel. 3.3.5 GEQ in Focus (24.4.2 and 16.4.
3 3.5 Universal Control and VSL Loading Scenes and Presets from VSL 3.5 Loading Scenes and Presets from VSL StudioLive™ Software Library Reference Manual As stated in the previous section, the Browser window in VSL functions in much the same way as the browser in Studio One. To load a Scene or preset from the Browser window, simply select it and drag it over the mixer or channel on which you wish to load it.
3 3.5 Universal Control and VSL Loading Scenes and Presets from VSL StudioLive™ Software Library Reference Manual 3.5.3 Loading a Fat Channel Preset To load every component in a Fat Channel preset (gate, compressor, EQ, etc.), select the preset from the Browser window and drag it over any part of the desired channel. If you drag it over any of the component microview, it will load only that component (e.g., if you drag a preset over the gate microview, only the gate will be loaded). 3.5.
3 3.6 Universal Control and VSL VSL: GEQ Tab StudioLive™ Software Library Reference Manual 3.5.5 Loading a GEQ Preset To load a graphic EQ preset, select it from the Browser window and drag it over any part of the focused graphic EQ. Graphic EQ presets can be loaded on the Overview tab or the GEQ tab. Once a preset is loaded, you can use the sliders in VSL, or the encoders on the StudioLive, to make adjustments.
3 3.6 Universal Control and VSL VSL: GEQ Tab StudioLive™ Software Library Reference Manual 3.6.2 Enabling a GEQ By default, all graphic EQs are disabled. To enable them remotely via VSL, simply click on the Enable button to the left of the sliders. 3.6.3 Flattening a GEQ Curve To zero out all curve settings on any GEQ, click on the Flatten GEQ button, which is directly below the Enable button. This will flatten all band gains to 0 dB so that they neither boost nor attenuate any of the 31 bands. 3.6.
3 3.6 Universal Control and VSL VSL: GEQ Tab StudioLive™ Software Library Reference Manual Many audio signals that are encountered in the field are highly dynamic. Musical signals, speech, and even environmental noise contain significant changes in spectral content as a function of time. The Spectrograph can be thought of as a record of multiple RTA measurements taken over time, with color representing amplitude.
3 3.6 Universal Control and VSL VSL: GEQ Tab StudioLive™ Software Library Reference Manual 3.6.7 Using the Smaart Spectrograph to Ring Out Monitors The Spectrograph shows frequency data over time, so a constant frequency, such as feedback, results in a straight line in the spectrograph. Feedback is short term for a feedback loop, where a portion of the signal from the speaker returns to the microphone resulting in a constant tone at the offending frequency.
3 3.6 Universal Control and VSL VSL: GEQ Tab StudioLive™ Software Library Reference Manual In a main system, feedback is typically in the mid to low range. The frequencies that are regenerating and creating a feedback loop are those frequencies that are wrapping around the main system due to the loss of directional control of lower frequencies.
3 3.6 StudioLive™ Software Library Reference Manual Universal Control and VSL VSL: GEQ Tab Another powerful use for the RTA is to help you quickly EQ a problematic instrument when dialing in your mix during sound check. In this example we will be using the RTA to identify the offending frequency in a ringing Floor Tom. 1. To begin, press and hold SIP on your StudioLive. SIP SIP 1 2 3 4 5 Select Select Select Select Select 2. Solo the Floor Tom channel.
3 3.6 Universal Control and VSL VSL: GEQ Tab StudioLive™ Software Library Reference Manual 8. Watch the RTA as the Floor Tom is played. Notice there is a spike at 250 Hz that correlates to the boomy ring you keep hearing. 9. On the StudioLive turn on the Low Mid EQ and set its frequency to 265 Hz. 10. Lower the gain until you hear (and see) the ring go away.
3 3.7 Universal Control and VSL VSL: Setup Tab 3.7 VSL: Setup Tab StudioLive™ Software Library Reference Manual The Setup tab allows you to customize VSL and your StudioLive, route your Auxiliary FireWire inputs (StudioLive 16.4.2 and 24.4.2 only), route your Flexible Inputs (StudioLive 16.0.2 only), set up MIDI Control mode (StudioLive 16.0.2 only), and enable or disable functions on connected iOS devices. 3.7.1 Auxiliary Inputs Router (16.4.2 and 24.4.
3 3.7 StudioLive™ Software Library Reference Manual Universal Control and VSL VSL: Setup Tab 3.7.2 Flexible Inputs Router (StudioLive 16.0.2 only). The StudioLive 16.0.2 allows you to choose between recording analog Inputs 15 and 16 or the main bus. This is done via the Flexible Inputs Router on the Setup tab. By default, your StudioLive is configured to record inputs 15 and 16 on FireWire Sends 15 and 16.
3 3.7 StudioLive™ Software Library Reference Manual Universal Control and VSL VSL: Setup Tab 3.7.7 Default to Fader Locate Preference With the Default to Fader Locate preference enabled, Fader Locate will automatically engage when a fader is moved remotely in VSL or StudioLive Remote. This preference allows you to quickly sync your StudioLive when you return to the board. Power User Tip: If you are remote-controlling the faders on your StudioLive, it is highly recommended that you enable this preference.
3 3.7 StudioLive™ Software Library Reference Manual Universal Control and VSL VSL: Setup Tab Channel Rename. Allows channels, auxes, and subgroups (16.4.2 and 24.4.2 only) to be renamed remotely using SL Remote. Ignore. When Ignore is enabled, the device’s installation of SL Remote will have no control over VSL.
3 3.8 Universal Control and VSL SmaartSystemCheckWizards(StudioLive16.4.2and24.4.2only) StudioLive™ Software Library Reference Manual 4. To lock your StudioLive, press the System button in the Digital Effects | Master Control section. System 5. Navigate to the Lockout menu. Your StudioLive cannot be locked unless this page is active. (StudioLive 16.4.2 and 24.4.2 users: If you have two StudioLive mixers linked, you only need to lock the Master unit to lock both mixers in the chain.) 6.
3 3.8 Universal Control and VSL SmaartSystemCheckWizards(StudioLive16.4.2and24.4.2only) StudioLive™ Software Library Reference Manual Clicking on the Smaart button at the top of the VSL window will launch Smaart System Check Mode. While in this mode you can launch any of the following wizards: •• SRA: Smaart Room Analysis generates a frequency-response trace and overlays it on the parametric EQ in VSL so you can adjust your system to get rid of unwanted anomalies in the room.
3 3.8 Universal Control and VSL SmaartSystemCheckWizards(StudioLive16.4.2and24.4.2only) StudioLive™ Software Library Reference Manual 3.8.1 Smaart Room Analysis Wizard The SRA Wizard is an automated process that will guide you through the steps of acquiring a frequency-response trace for your audio system. A frequencyresponse trace is the plotted result (frequency and amplitude) of the system measurement.
3 3.8 Universal Control and VSL SmaartSystemCheckWizards(StudioLive16.4.2and24.4.2only) StudioLive™ Software Library Reference Manual 4. You will be asked which output you would like to analyze. Stereo-linked outputs will be listed as stereo. (e.g., If Sub 1 and Sub 2 are stereo-linked, they will be listed as Sub 1/2) 5. Click OK to start the wizard. Next you will be asked to pick the type of analysis you would like to do. Basic Analysis requires you to take a single measurement of your system.
3 3.8 Universal Control and VSL SmaartSystemCheckWizards(StudioLive16.4.2and24.4.2only) StudioLive™ Software Library Reference Manual 5. To mute the pink noise at any time, simply click on the Speaker Icon. 6. Click OK when the pink noise is at the appropriate level. 7. Click Analyze to generate the frequency-response trace. 8. Adjust the EQ to shape the frequency-response into the correct Trend for your application. (See Sections 3.8.6 and 3.8.7 for best practices.
3 3.8 Universal Control and VSL SmaartSystemCheckWizards(StudioLive16.4.2and24.4.2only) StudioLive™ Software Library Reference Manual 3. Click OK when your microphone is properly placed. 4. Raise the fader until the pink noise output through your speaker is louder than the ambient noise floor in the room. At the appropriate measurement level, you should not hear the air conditioning, traffic noise from the street, etc. 5. To mute the pink noise at any time, simply click on the Speaker Icon. 6.
3 3.8 Universal Control and VSL SmaartSystemCheckWizards(StudioLive16.4.2and24.4.2only) StudioLive™ Software Library Reference Manual 12. Click Analyze to generate the third frequency-response trace. 13. Adjust the EQ to shape the frequency response into the correct trend for your application. (See Sections 3.8.6 and 3.8.7 for best practices.) In general, you do not want to boost any frequencies and you do not want to make any cuts greater than 6 dB. 14. Click Exit to complete the wizard.
3 3.8 StudioLive™ Software Library Reference Manual Universal Control and VSL SmaartSystemCheckWizards(StudioLive16.4.2and24.4.2only) I just wanted to mix sound...... I didn’t know there’d be math 2 5 x-16 5 x-15 = 8 2 5 x-16+15 5 x-15+16 = 8 5 5 5 2 x= 8 x- 8 x-1 5 x- 8 2 5 x( 5 - 8 )=-1 2 8 5 8 x( 5 8 - 8 8 )=-1 *Special thanks to our friends at www.roadie.net for the use of this awesome cartoon.
3 3.8 Universal Control and VSL SmaartSystemCheckWizards(StudioLive16.4.2and24.4.2only) StudioLive™ Software Library Reference Manual When using the SSD Wizard for the above system, you would run the wizard four times. The first time, you’d use the main front-of-house left for the main system and the left sidefill for the delay system. The second time, you will use the left sidefill as the main system, and the left rear-fill for the delay system. Then repeat the proceedure for the right side.
3 3.8 Universal Control and VSL SmaartSystemCheckWizards(StudioLive16.4.2and24.4.2only) 7. StudioLive™ Software Library Reference Manual Place your microphone on-axis in front of the speaker you want to delay. See Section 3.8.5 for tips in choosing the best primary mic position. 1 8. Click OK when your microphone is properly placed. 9. Raise the fader until the pink noise outputted through your main system (the speaker to which you want to align) is louder than the ambient noise floor in the room.
3 3.8 StudioLive™ Software Library Reference Manual Universal Control and VSL SmaartSystemCheckWizards(StudioLive16.4.2and24.4.2only) 15. Click Apply to set that measure delay time on the subgroup out. 16. Click Exit to leave the wizard. Note: For delay times between 0 and 50 ms, the delay will be set to the nearest 0.5 ms; between 51 and 100 ms, the delay will be set to the nearest 1 ms; and between 102 and 300 ms, the delay time will be set to the nearest 2 ms.
3 3.8 Universal Control and VSL SmaartSystemCheckWizards(StudioLive16.4.2and24.4.2only) StudioLive™ Software Library Reference Manual Click on the Output Check tab to use the Smaart Output Check Wizard. You will be shown buttons for all outputs on your StudioLive. Click on an output’s button, and pink noise will fade in for three seconds. You can click on the button again to stop it. To adjust the pink noise, use the fader on the right side of the page. 3.8.
3 3.8 Universal Control and VSL SmaartSystemCheckWizards(StudioLive16.4.2and24.4.2only) StudioLive™ Software Library Reference Manual 5. From the Smaart System Check Wizards, click on the Go Remote button. This will pull down a menu of connected iPads. Select your iPad from the list. 6. You can now continue the wizard from SL Remote. Any iPad that has been given FOH permission can launch the Smaart System Check Wizards remotely.
3 3.8 Universal Control and VSL SmaartSystemCheckWizards(StudioLive16.4.2and24.4.2only) StudioLive™ Software Library Reference Manual Secondary Mic Position You will use two different secondary positions in a multi-point measurement. These can be on- or off-axis measurements of a speaker within the listening area. This will allow the SRA wizard to create an average frequency response of your sound system. Avoid using locations outside the core coverage area of your system or on the edges.
3 3.8 Universal Control and VSL SmaartSystemCheckWizards(StudioLive16.4.2and24.4.2only) StudioLive™ Software Library Reference Manual •• Do a ground-plane measurement. •• Do a multi-point measurement. Enough measurement positions will randomize the effect of the floor bounce. 3.8.6 System Alignment Rules The visual result of a sound-system test can be a powerful tool; however, like all powerful things, you must be responsible about how you wield it.
3 3.8 Universal Control and VSL SmaartSystemCheckWizards(StudioLive16.4.2and24.4.2only) StudioLive™ Software Library Reference Manual If you can’t find a physical solution and can’t mitigate the issue with level and delay control, it’s time to employ the system EQ. A frequency-response trace is not a video game. Your goal is to fix your system and make it sound the best it can, not create an EQ curve that is an exact inversion of the frequency-response trace. Mix with your ears, not your eyes.
3 3.8 StudioLive™ Software Library Reference Manual Universal Control and VSL SmaartSystemCheckWizards(StudioLive16.4.2and24.4.2only) Below are some examples of trends for various applications: Music Concert: Subs 2 to 4 kHz Rock Concert: Subs Extended LF 2 to 4 kHz Music Playback/Reproduction Subs Speech Intelligibility 100 Hz 2 to 4 kHz Power User Tip: The amplitudes depicted in the trend examples above are guidelines: examples of very general slopes required for different applications.
3 3.8 StudioLive™ Software Library Reference Manual Universal Control and VSL SmaartSystemCheckWizards(StudioLive16.4.2and24.4.2only) Spotting the Trend: Real World Example Let’s take a look at the following frequency response trace. In this example we can see a few peaks that don’t go along with our application, for our purposes, let’s make that a music concert.
3 3.8 Universal Control and VSL SmaartSystemCheckWizards(StudioLive16.4.2and24.4.2only) StudioLive™ Software Library Reference Manual A parametric EQ is an ideal tool to shape your system’s frequency-response trace into a trend that will complement your application; with a parametric EQ, you have the ability to effect large areas of bandwidth, with minimal electronic smearing to the signal. This also frees up your graphic EQ for aesthetic adjustments or fine-tuning.
4 4.1 StudioLive Remote for iPad Networking your iPad and Computer 4 StudioLive Remote for iPad StudioLive™ Software Library Reference Manual StudioLive Remote (SL Remote) for iPad provides an unprecedented level of remote control over your StudioLive. With SL Remote, you can adjust level, pan, dynamics, bus routing, FX mixes, aux mixes, and GEQ settings from an Apple iPad via a wireless network. All you need is a computer with Wi-Fi capabilities and an Apple iPad, and you’re ready to get started. 4.
4 4.1 StudioLive Remote for iPad Networking your iPad and Computer StudioLive™ Software Library Reference Manual Windows 7 1. Open Start>Control Panel. 2. Click “Network and Internet.” 3. Click “Network and Sharing Center.” 4. Under “Change your networking settings,” click “Set up a new connection or network.” 5. Select “Set up a wireless ad hoc (computer-to-computer) network.” 6. Click on “Next” twice. 7. Enter the network name, such as “StudioLive.” 8. Select the Security WAP (or WEP). 9.
4 4.1 StudioLive Remote for iPad Networking your iPad and Computer StudioLive™ Software Library Reference Manual 4.1.2 STEP 2: Connect your iPad to your Ad Hoc Network 1. Tap on the Settings icon in your iPad. 2. Tap on “Network.” 3. Tap on “Wi-Fi.” 4. Under “Choose a Network,” you should now see your ad hoc network in the list. 5. Tap on your newly created network to select it. 6. If you secured your network with a password, you will be prompted to enter it. 7.
4 4.1 StudioLive Remote for iPad Networking your iPad and Computer StudioLive™ Software Library Reference Manual 4.1.3 STEP 3: Connecting to Virtual StudioLive and StudioLive Mixers Once you have created your ad hoc network and joined it from your iPad, you are ready to launch StudioLive Remote.
4 4.2 StudioLive Remote for iPad Overview Page 4.2 Overview Page StudioLive™ Software Library Reference Manual The Overview page in StudioLive Remote corresponds directly with most of the controls on the Overview page in VSL.
4 4.2 StudioLive Remote for iPad Overview Page StudioLive™ Software Library Reference Manual that component in focus; for example, if you tap on the EQ Microview, the Fat Channel zoom will open with the EQ in focus. The zoomed Fat Channel view corresponds directly to the Fat Channel tab in VSL. You can switch between the dynamics components in the zoomed Fat Channel view by swiping your finger to the left or right.
4 4.3 StudioLive Remote for iPad Aux Mix Page StudioLive™ Software Library Reference Manual Metering. Displays the Signal Level for Each Channel. To the left of the fader, you will see the meter for the channel. The meter will follow the meter mode selected on the StudioLive or from VSL. The meter mode cannot be changed from SL Remote. 4.2.
4 4.3 StudioLive Remote for iPad Aux Mix Page StudioLive™ Software Library Reference Manual 4.3.1 Aux Mix Select and Aux Mixing To create an aux mix using StudioLive Remote, tap anywhere in the Aux Mix Select tab for that aux. The selected Aux Mix tab will be highlighted to alert you that its individual channel-send levels will be displayed below. Press the Post button to engage post-fader sends (StudioLive 16.4.2 and 24.4.2 only).
4 4.3 StudioLive Remote for iPad Aux Mix Page StudioLive™ Software Library Reference Manual To adjust the send levels for any channel, tap anywhere in its send level and move your finger up or down, while maintaining constant contact with the iPad screen. These send-level displays have been designed to emulate the StudioLive Fat Channel meters while in Aux Mix mode, so they should look very familiar! Power User Tip: The FX sends support off-axis movement.
4 4.4 StudioLive Remote for iPad GEQ Page 4.4 GEQ Page StudioLive™ Software Library Reference Manual As with StudioLive and VSL, StudioLive Remote includes a Graphic EQ page so that you can tune the room from any listening position or can dial in a monitor on stage while you are actually standing in front of it. The GEQ page in StudioLive Remote corresponds directly to the GEQ tab in VSL.
4 4.4 StudioLive Remote for iPad GEQ Page StudioLive™ Software Library Reference Manual Zooming Out. Zooms View Out. Press the “-” button to zoom out the GEQ view. If you have not zoomed all the way out (so that you don’t have all 31 bands on your screen), you can slide your finger to the left or right to access additional bands. Use the Overview Map in the bottom right corner of the GEQ page to reference your current position within the 31 bands. Draw Tool.
4 4.6 StudioLive Remote for iPad Settings Page 4.6 Settings Page StudioLive™ Software Library Reference Manual The Settings page allows you to set scrolling and metering functions and to create custom names for each channel, aux, and subgroup (16.4.2 and 24.4.2 only) in your mix. Scroll by Page. Scrolls Through Channels by Page. When the Scroll by Page option is enabled, the mixer will scroll to through channels by entire pages, rather than by individual channels.
4 4.6 StudioLive™ Software Library Reference Manual StudioLive Remote for iPad Settings Page Channel Naming. Creates Custom Names for Channels, Auxes, and Subgroups. To create a custom name for any channel, aux, or subgroup in your mix, simply tap on the text field next to it. This will launch the iPad keyboard. After you have entered the new name, tap the Done button. The channels’ default name will be replaced with its new custom name in SL Remote, VSL, and QMix.
4 4.7 StudioLive Remote for iPad Channel Zoom Page 4.7 Channel Zoom Page StudioLive™ Software Library Reference Manual The Channel Zoom page opens automatically when you turn your iPad to the Portrait view. This page provides you with a look at every controllable parameter for a channel or bus. It also allows you to quickly scroll through every channel and bus on your mixer by sliding your finger down the right side of your screen.
5 5.1 QMix for iPhone and iPod touch Networking your iPhone or iPod touch and Computer 5 QMix for iPhone and iPod touch StudioLive™ Software Library Reference Manual QMix for iPhone and iPod touch puts each musician’s monitor (aux) mix in his or her own hands. With QMix, you can adjust each StudioLive channel’s aux-send level to taste and can create a group of channels that you simultaneously control with the amazing Wheel of Me.
5 5.1 QMix for iPhone and iPod touch Networking your iPhone or iPod touch and Computer StudioLive™ Software Library Reference Manual 6. Click on “Next” twice. 7. Enter a network name, such as “StudioLive.” 8. Select the Security WAP (or WEP). 9. Enter the Security key or password. For the best security, include letters, numbers, and punctuation. Then click OK. 10. Check “Save this network.” 11. Click “Turn on Internet connection sharing.” Windows 8 Windows 8 does not natively support ad hoc connections.
5 5.1 QMix for iPhone and iPod touch Networking your iPhone or iPod touch and Computer StudioLive™ Software Library Reference Manual 5.1.3 Step 3: Connecting QMix to StudioLive Mixers Once you have created your ad hoc network and joined it from an iPhone/iPod touch, you are ready to launch QMix. Important: You must connect to your computer’s ad hoc network each time you plan on remote-controlling your StudioLive with QMix. The iPhone and iPod touch offer two viewing options: Landscape and Portrait.
5 5.2 QMix for iPhone and iPod touch Aux Mix Page 5.2 Aux Mix Page StudioLive™ Software Library Reference Manual The Aux Mix page shows the send level for each channel on each aux to which your iOS device has access. It corresponds directly to the aux mixes in VSL and has been streamlined to show only the send levels. To open the Aux Mix page, simply hold your iPhone/iPod touch in Landscape view. Aux Mix Select. Displays Channel Send Levels to Aux Bus.
5 5.3 QMix for iPhone and iPod touch Wheel of Me StudioLive™ Software Library Reference Manual Lock Orientation. Locks Device in the Landscape View. Enabling the Lock Orientation button will lock your iPhone/iPod touch in Landscape view. While this button is enabled, you cannot open the Wheel of Me. Locking the view will also remove the Start Page button. Until this option is disabled, QMix will launch in this view when connected to the current mixer. 5.
5 5.4 StudioLive™ Software Library Reference Manual QMix for iPhone and iPod touch Settings Page Wheel of Me. Controls the Level of the Me Channels The Wheel of Me increases or decreases the level of your Me channels as a mix relative to the rest of the channels (the Band). If you increase the level of your Me channels beyond the top level, the other channels will decrease in volume. On either side of the Wheel of Me, you will find Me and Band mix indicators.
6 6.1 Capture Start Page 6 Capture StudioLive™ Software Library Reference Manual Capture™ is a digital audio multitracking application designed to make recording with your StudioLive quick and easy. With the look and feel of industry-standard digital multitrack hard-disk recorders, it is instantly familiar to every musician and engineer.
6 6.2 StudioLive™ Software Library Reference Manual Capture The Session Page Audio Device and Sample Rate Capture was specifically created for use with the PreSonus StudioLive series mixer and will only work with that device. It is not possible to configure any other audio device for use with Capture, as it relies on the StudioLive mix bus.
6 6.2 StudioLive™ Software Library Reference Manual Capture The Session Page Capture Playback Routing STUDIOLIVE 16.4.
6 6.2 StudioLive™ Software Library Reference Manual Capture The Session Page Fast Forward. Fast Forwards as long as this button is enabled. Next Marker. Jumps the playback cursor to the next marker. Back to Beginning. Returns the playback cursor to the beginning of the Session. Stop. Stops playback. Play. Starts playback at the current playback-cursor position. Record. Starts recording at the current playback-cursor position. Loop. Engages/disengages Loop mode. Time Display.
6 6.2 StudioLive™ Software Library Reference Manual Capture The Session Page 6.2.3 Editing Tools In the upper right corner, you will see four editing-tool buttons. These tools will determine the function of your mouse during editing. Power User Tip: The audio-editing process can be unforgiving: Small inaccuracies when splitting, moving, or performing other actions on recorded audio can lead to unwanted results. As simple as it may seem, the act of listening while editing is often overlooked.
6 6.2 StudioLive™ Software Library Reference Manual Capture The Session Page 6.2.3.2 Range Tool The Range tool is used to select a range, or area, within events. Click on the Range tool button or press [number 2] on the keyboard to select the Range tool. To select a range within an event, using the Range tool, click-and-drag over the area to be selected; a gray box will be drawn over the target selection area.
6 6.2 StudioLive™ Software Library Reference Manual Capture The Session Page 6.2.3.4 Eraser Tool The Eraser tool is used to delete an event. Click on the Eraser Tool button or press [number 4] on the keyboard to select the Eraser tool. To delete any event using the Eraser tool, simply click on the event. The Eraser tool is unaffected by the current selection and will only affect the event that is directly clicked on.
6 6.3 StudioLive™ Software Library Reference Manual Capture Creating a New Capture Session •• Track Mute: Each track features a Mute button. This mutes the track during playback. •• Track Solo: Each track features a Solo button. This will solo the track and mute all other tracks during playback (similar to the SIP function on the StudioLive). •• Vertical Zoom: In the lower left-hand corner of the Edit Window, you will find the vertical-zoom controls.
6 6.4 Capture Recording in Capture StudioLive™ Software Library Reference Manual 3. Session Title. This will be the title of your Session and will be the Session file name, as well as the name of the new folder that contains all data related to your Session. 4. Session Location. This is where new Sessions and all related data will be saved. The Session location can be chosen each time you create a Session. By default, the new Session location will be the Capture folder in your Documents folder.
6 6.5 Capture Capture Session Navigation StudioLive™ Software Library Reference Manual 6.4.3 Capture Main Source Selection (StudioLive 16.4.2 and 24.4.2 only) The Auxiliary Stereo Track in Capture is a stereo channel intended to be used to record a stereo mix from your StudioLive. This mix can be recorded while recording the individual input channels, so a mix is available immediately after a live show, or you can use this channel to route your final studio mixes through the StudioLive.
6 6.5 Capture Capture Session Navigation StudioLive™ Software Library Reference Manual 6.5.3 Using Markers In Capture, the Marker Lane is used to place markers at desired places in the Timeline, after which navigation to the markers is easy. Markers are also helpful when exporting your Session to individual mixes or to work in another recording application. The Marker Lane is always visible, just below the Timeline.
6 6.6 StudioLive™ Software Library Reference Manual Capture Mixing Your Session Once your loop range is set, you can click on the Loop button in the transport, or press [L] or [/] on the keyboard to engage Loop mode. Please Note: Engaging Record in the transport will disable Loop mode and will begin recording at the current playback-cursor position. It is not possible to engage Loop while recording. 6.
6 6.6 Input StudioLive™ Software Library Reference Manual Capture Mixing Your Session Input Input Input Input Input Input Input Input Input Input Input Input Input Input Input 2. Be sure that Record Arm is disabled for all audio-input tracks in Capture and that the FireWire returns for all input channels on the StudioLive mixer are engaged. 3. In Capture, select the Auxiliary Stereo Track (StudioLive 16.4.2 and 24.4.2) or Track 15/16 (StudioLive 16.0.2) and enable Record Arm. 4.
6 6.6 Capture Mixing Your Session StudioLive™ Software Library Reference Manual 6.6.3.1 Save a Capture Session as OpenTL Many audio-recording programs can open OpenTL (Open Track List) files. An OpenTL file provides a reference for all of the audio tracks and audio events, with their corresponding positions, in a Capture Session, so that another audio program can reconstruct your Session automatically.
6 6.7 Capture Importing Audio Files StudioLive™ Software Library Reference Manual 6.6.3.2 Import Capture Session Audio Files Directly Some audio-editing applications (such as digital audio workstations, or DAWs) do not support the OpenTL format, which makes the options somewhat limited when importing sessions created in other programs. In this case, you must manually import the audio events from your Capture Session into the audioediting application, using whatever means possible in that program.
6 6.8 StudioLive™ Software Library Reference Manual Capture Export Audio Files 4. Then click on Open to import the file into your Session. 5. An audio event for the imported file will be created and placed on the currently selected track in your Session, at the current playback-cursor position. 6.7.1 Preview Player When browsing for files in the Import File menu, it is possible to listen to the audio files as you are browsing in the Preview Player.
6 6.8 Capture Export Audio Files StudioLive™ Software Library Reference Manual Format Select the format of the mixdown audio file in the middle section of the Export to Audio File menu. Choose from WAV or AIFF, and then choose the desired resolution and sample rate. If you wish to put your audio on a standard audio CD, the format should be a WAV file with 16-bit resolution and a 44.1 kHz sample rate.
6 6.9 Capture Capture Key Commands 6.9 Capture Key Commands Action Key Command File Menu StudioLive™ Software Library Reference Manual Action Key Command Transport...
StudioLive™ Software Library Reference Manual 7 7.1 Studio One Artist Quick Start Installation and Authorization 7 Studio One Artist Quick Start Your StudioLive mixer comes with Studio One Artist recording and production software. Whether you are about to record your first album or your fiftieth, Studio One Artist provides you with all of the tools necessary to capture and mix a great performance.
7 7.1 Studio One Artist Quick Start Installation and Authorization StudioLive™ Software Library Reference Manual 7.1.2 Creating a User Account 1. After installing Studio One Artist, launch the program, and the Activate Studio One menu will appear. 2. Click on the Activate or Upgrade link to begin. 3. If you are a new Studio One user, you will need to create a user account. Click on the “Create New Account” link if your computer is connected to the Internet.
7 7.1 Studio One Artist Quick Start Installation and Authorization StudioLive™ Software Library Reference Manual 4. Fill out the user registration form. You will be asked to create a username and password. This information will be used to access your PreSonus user account on the PreSonus Web site. With this account, you can manage the registrations for all of your PreSonus hardware and software products.
7 7.1 Studio One Artist Quick Start Installation and Authorization StudioLive™ Software Library Reference Manual 7.1.3 Activating Studio One Artist Online Now that you have created a user account, you can activate your copy of Studio One Artist. 1. Click on the Activate Online link. 2. Your previously created account username and password will automatically be filled in. Enter the Studio One Product Key located on the Studio One Artist disc wallet. 3.
7 7.1 Studio One Artist Quick Start Installation and Authorization StudioLive™ Software Library Reference Manual 7.1.4 Activating Studio One Artist Offline 1. Click on the Activate Offline Link. 2. Write down the Activation Code listed under Step 3 in the onscreen instructions. You will need this for Step 9.
7 7.1 Studio One Artist Quick Start Installation and Authorization StudioLive™ Software Library Reference Manual 3. Visit http://www.presonus.com/registration/ on an Internet-connected computer and click on the Create New Account to create your PreSonus user account. 4. Fill out the PreSonus Registration form.
7 7.1 Studio One Artist Quick Start Installation and Authorization StudioLive™ Software Library Reference Manual 5. Once you have created your user account, log in and click on the Software Registration link. 6. Enter the Product Key located on the Studio One Artist disc wallet and click “Submit.” 7. When product key is registered, you see a list of links to download Studio One Artist and its bundled content. Click the Software List link to view your full registration information.
7 7.1 Studio One Artist Quick Start Installation and Authorization StudioLive™ Software Library Reference Manual 8. Click on the Activate link. 9. Enter the Activation Code you wrote down in Step 2. 10. You will see a list the available downloads for your product registration. This includes the latest application installers as well as installers for the Studio One Artist content packages. Click on the Download License link at the top. 11. A file called “Studio One 2 Artist.
7 7.1 Studio One Artist Quick Start Installation and Authorization StudioLive™ Software Library Reference Manual 12. After installing Studio One Artist, launch the program, and the Activate Studio One menu will appear. 13. Click on the Activate or Upgrade link to begin. 14. From the Activate Studio One Menu, click on the “Activate Offline” link.
7 7.1 Studio One Artist Quick Start Installation and Authorization StudioLive™ Software Library Reference Manual 15. Drag the “Studio One 2 Artist.license” file onto the Offline Activation window to complete the activation. 7.1.5 Installing Bundled Content for Studio One Artist The Studio One Artist bundle includes all that you need to begin producing music. This includes an array of demo and tutorial material, instruments, loops, samples, and other third-party content.
7 7.1 Studio One Artist Quick Start Installation and Authorization StudioLive™ Software Library Reference Manual 2. At the top of the installation menu, select the source from which the content will be installed, as well as the location where you wish to install the content. The source of the content will be the same DVD from which you installed Studio One Artist. By default, Studio One Artist will point to your DVD drive as the content source. 3.
7 7.1 Studio One Artist Quick Start Installation and Authorization StudioLive™ Software Library Reference Manual 7.1.6 Installing Third-Party Content To install any of the third-party content, click on the arrow button next to its name in the content list (Celemony Melodyne Trial and Native Instruments Komplete Player). Notice that next to Native Instruments Komplete a serial number is listed. You will need this number to authorize the plug-in the first time you open it.
7 7.1 Studio One Artist Quick Start Installation and Authorization StudioLive™ Software Library Reference Manual 7.1.7 Enabling the Audio Driver Studio One Artist was designed with PreSonus interfaces in mind, so the StudioLive setup is quick and easy. When Studio One Artist is launched, by default you will be taken to the Start page.
7 7.2 StudioLive™ Software Library Reference Manual Studio One Artist Quick Start Configuring MIDI Devices In the Audio Device menu, select “PreSonus FireStudio.” Click the Apply button and then OK. After you have verified that the PreSonus FireStudio driver has been detected (remember: StudioLive shares a driver with the PreSonus FireStudio family of interfaces), please continue to the next section to set up your external MIDI devices.
7 7.2 Studio One Artist Quick Start Configuring MIDI Devices StudioLive™ Software Library Reference Manual 1. Connect the MIDI Out of your external MIDI controller to a MIDI In on your StudioLive 16.0.2 or other MIDI interface (StudioLive 16.4.2 and 24.4.2. owners will need to use a separate MIDI interface). If you are using a USB MIDI controller, connect it to your computer and power it on. 2.
7 7.2 Studio One Artist Quick Start Configuring MIDI Devices StudioLive™ Software Library Reference Manual 5. From the menu on the left, select New Keyboard. At this point, you can customize the name of your keyboard by entering the manufacturer and device names. 6. You must specify which MIDI channels will be used to communicate with this keyboard. For most purposes, you should select all MIDI channels. If you are unsure of which MIDI channels to choose, select all 16. 7.
7 7.2 StudioLive™ Software Library Reference Manual Studio One Artist Quick Start Configuring MIDI Devices 7.2.2 Setting up an External MIDI Sound Module from the Start Page MIDI instrument controllers (keyboards, MIDI guitars, etc.) send musical information in the form of MIDI data to tone modules and virtual instruments, which respond by generating sound, as instructed. Tone modules can be standalone sound devices or can be integrated into a MIDI instrument, such as a keyboard synthesizer.
7 7.2 Studio One Artist Quick Start Configuring MIDI Devices StudioLive™ Software Library Reference Manual 3. The Add Device window will launch. 4. From the menu on the left, select New Instrument. At this point, you can customize the name of your sound module by entering the manufacturer and device names. 5. Specify which MIDI channels will be used to communicate with this keyboard. For most purposes, you should select all MIDI channels.
7 7.3 Studio One Artist Quick Start Creating a New Song 7.3 Creating a New Song StudioLive™ Software Library Reference Manual Now that you’ve configured your MIDI devices, let’s create a new Song. 7.3.1 Creating a New Song from a StudioLive Template 1. From the Start page, select Create a new Song. 2. In the Browser window, name your Song and choose the directory in which you’d like it saved. You’ll notice a list of templates on the left.
7 7.3 Studio One Artist Quick Start Creating a New Song StudioLive™ Software Library Reference Manual 3. Select Empty Song from the Templates list. 4. Select your preferred sample rate and bit depth. You can also determine the length of your Song and the type of time format you would like to use (Notation Bars, Seconds, Samples, or Frames). 5. Click the OK button when you are finished. 6.
7 7.3 Studio One Artist Quick Start Creating a New Song StudioLive™ Software Library Reference Manual 9. We recommend that you create a mono input for each of the inputs on your StudioLive. If you plan on recording in stereo, you should also create a stereo bus and assign it to the appropriate set of inputs. StudioLive 16.0.2 users may wish to make a stereo input for channels 9/10 through 15/16. 10. You can remove any bus by simply selecting it and clicking the Remove button. 11.
7 7.3 Studio One Artist Quick Start Creating a New Song StudioLive™ Software Library Reference Manual 13. Click on the Outputs tab, and you will see all of the available outputs on your StudioLive. We recommend that you create a mono output for each of your StudioLive’s FireWire Returns and a stereo output for the Main FireWire Return on your StudioLive. 14. Be sure to patch the Main Out bus to the Main FireWire return on your StudioLive (16.0.2: Returns 1/2; 16.4.
7 7.4 Studio One Artist Quick Start Creating Audio Tracks 7.4 Creating Audio Tracks StudioLive™ Software Library Reference Manual In the upper left corner of the Arrange window, you will notice several buttons. The third button from the left is the Add Tracks button. Click this button to bring up the Add Tracks window.
7 7.5 Studio One Artist Quick Start Creating MIDI Tracks StudioLive™ Software Library Reference Manual 7.4.1 Anatomy of an Audio Track Solo Level Mute Track Name Track Color Select Rec Arm Meter Audio Input Select ST/Mono Monitor (in S1) 7.5 Creating MIDI Tracks 1. Click on the Add Tracks button. 2. When the Add Tracks window launches, select Instrument as the track format and click the OK button. 3. To assign your MIDI input, click on the MIDI Outputs list and select your external MIDI module.
7 7.5 Studio One Artist Quick Start Creating MIDI Tracks StudioLive™ Software Library Reference Manual 5. If you selected your MIDI keyboard controller as the default keyboard, it will already be selected. If not, choose your MIDI controller from the Input menu directly below. 6. To the left of the Add Track button, you will find the Inspector button. Click it to display more parameters for the selected track. 7. At the bottom of the Inspector menu, you will see your Bank and Program selections.
7 7.5 StudioLive™ Software Library Reference Manual Studio One Artist Quick Start Creating MIDI Tracks Left 100 - 240 VAC 50-60Hz Right On 10. MIDI data does not contain audio signals. To hear your sound module, you must connect the audio output of the sound module to a StudioLive input, then connect the StudioLive’s audio outputs to a sound system. (You also can listen on headphones, using the headphone output.
7 7.5 Studio One Artist Quick Start Creating MIDI Tracks StudioLive™ Software Library Reference Manual 7.5.1.1 Configuring StudioLive 16.0.2 as a MIDI Device To configure your StudioLive 16.0.2 for control by Studio One Artist, you must first add the StudioLive as an external device. 1. From the Studio One Artist Start page, click on the External Devices link. 2. Click on the Add button. 3. Select New Instrument. 4. In the Device Name field, enter “StudioLive.
7 7.5 Studio One Artist Quick Start Creating MIDI Tracks StudioLive™ Software Library Reference Manual 5. From the Send To menu, select “PreSonus FireStudio Port 1.” 6. Click the All button to enable all MIDI channels. 7. Click OK. 8. In the StudioLive System menu, navigate to Page 4: MIDI Presets. 9. Set MIDI Control Mode to “ON.” 10. Set MIDI Source to “FireWire.” 7.5.1.
7 7.5 Studio One Artist Quick Start Creating MIDI Tracks StudioLive™ Software Library Reference Manual 3. Open the Inspector. 4. You will see that MIDI channel 1 is already selected so let’s change a StudioLive Scene. 5. Check the box next to Program. 6. If you don’t see the Program field, drag down the Resize bar at the top of the Inspector to show the hidden fields. 7. Double-click on the Prog field and type in the number of the Scene you wish to recall.
7 7.5 Studio One Artist Quick Start Creating MIDI Tracks StudioLive™ Software Library Reference Manual 7.5.1.3 Controlling FXA, FXB, and Main Output Levels 1. In Studio One, select the Paint tool. 2. Using the Paint tool, draw a MIDI region several bars long. 3. Set the MIDI channel for the Instrument track to 4. 4. In the Track menu, select “Add Automation Track.” 5. From the Automation Track Inspector, click on the Parameter menu and select “Add/Remove.
7 7.5 Studio One Artist Quick Start Creating MIDI Tracks StudioLive™ Software Library Reference Manual 6. From the Automation window, select “External Devices StudioLive MIDI.” 7. Select CH 4.
7 7.5 Studio One Artist Quick Start Creating MIDI Tracks StudioLive™ Software Library Reference Manual 8. Scroll through the MIDI Control Change list until you find Controls 40-42. 9. Select these controls and click Add.
7 7.5 Studio One Artist Quick Start Creating MIDI Tracks StudioLive™ Software Library Reference Manual 10. Click Close. 11. Select Control 42 from the parameter pull-down menu on the automation track. 12. Using your Paint tool, draw an automation curve. 13. Press Play to hear Studio One control the main output level of your StudioLive. You can use the same steps to create volume-curve automation for FXA and FXB output levels on your StudioLive mixer.
7 7.5 Studio One Artist Quick Start Creating MIDI Tracks StudioLive™ Software Library Reference Manual 7.5.1.4 Assigning/Unassigning FXA and FXB to the Main Bus 1. In Studio One, select the Paint tool. 2. Using the Paint tool, draw a MIDI region several bars long. 3. Set the MIDI channel for the Instrument track to 4. 4. In the Track menu, select Add Automation Track. 5. From the Automation Track Inspector, click on the Parameter menu and select “Add/Remove.
7 7.5 Studio One Artist Quick Start Creating MIDI Tracks StudioLive™ Software Library Reference Manual 6. From the Automation window, select “External Devices StudioLive MIDI.” 7. Select CH 4.
7 7.5 Studio One Artist Quick Start Creating MIDI Tracks StudioLive™ Software Library Reference Manual 8. Scroll through the MIDI Control Change list until you find Sustain Pedal On/ Off (CC 64) and Sustenuto Pedal On/Off (CC 66). Unlike volume control, the mute controls require On/Off messages; therefore, we recommend using these two Control Change numbers when controlling the StudioLive 16.0.2 with Studio One Artist. Select each control and click Add. 9. Click Close. 10.
7 7.6 Studio One Artist Quick Start Adding Virtual Instruments and Plug-in Effects to Your Song StudioLive™ Software Library Reference Manual 11. Using your Pencil tool, draw an “ON” message that lasts for several bars. Note that the FXA/FXB assignment to the main bus is a simple toggle, so when it receives its CC message, the button will be put into the opposite of its current state.
7 7.6 Studio One Artist Quick Start Adding Virtual Instruments and Plug-in Effects to Your Song StudioLive™ Software Library Reference Manual The Mix button opens and closes the mixer window. The Browse button opens the Browser window, which displays all of the available virtual instruments, plug-in effects, audio files, and MIDI files, as well as the pool of audio files loaded into the current session.
7 7.6 Studio One Artist Quick Start Adding Virtual Instruments and Plug-in Effects to Your Song StudioLive™ Software Library Reference Manual At the bottom of the Browser window, you will find six category tabs: •• Home opens hot links to the other five tabs. •• Instruments opens a list of all the available Virtual Instruments that you have installed on your computer. •• Effects opens a list of all the available plug-in effects that you have installed on you computer.
7 7.7 Studio One Artist Quick Start Recording in Studio One Artist StudioLive™ Software Library Reference Manual 7.6.3 Drag-and-Drop Audio and MIDI Files Audio and MIDI files can be quickly located, auditioned, and imported into your Song by dragging them from the file browser into the Arrange view. If you drag the file to an empty space, a new track will be created with that file placed at the position to which you dragged it.
7 7.7 Studio One Artist Quick Start Recording in Studio One Artist StudioLive™ Software Library Reference Manual 3. Connect a microphone to the channel 1 input on the StudioLive. 4. Select Record Enable on your track in Studio One Artist. 5. Turn up the Channel 1 level while speaking/singing into the microphone. You should see the input meter in Studio One Artist react to the input. 6. Adjust the gain so the input level is near its maximum without clipping (distorting). 7.
7 7.7 StudioLive™ Software Library Reference Manual Studio One Artist Quick Start Recording in Studio One Artist Reference Monitors 8. If you wish to listen to your StudioLive with studio monitors, make sure to connect them to the StudioLive’s Control Room outputs. Main 9. Enable the Main bus in the monitor bus on your StudioLive so you can monitor through headphones or using the Control Room Outs on your StudioLive and your studio monitors. 10. In Studio One, click Record. 11.
7 7.7 Studio One Artist Quick Start Recording in Studio One Artist StudioLive™ Software Library Reference Manual 13. On the StudioLive, engage the Main FW Return button in the Monitor Bus. 14. Click the Return to Zero button in Studio One or press the “ , ” (comma) key to return to the beginning of the Song. 15. Click Play in Studio One, or press the Space bar to listen to your recording.
88 8.1 8.1 Troubleshooting Troubleshooting Universal Control: Universal Control: Driver Driver andand General General Connectivity Connectivity 8 Troubleshooting StudioLive™ StudioLive™ Software 24.4.2/16.4.2 Library Owner’s ReferenceManual Manual Many technical issues can arise when using a standard computer as a digital audio workstation (DAW) and when networking wireless devices.
88 8.2 8.2 Troubleshooting Troubleshooting Universal Control: Universal Control: VSL VSL 8.2 Universal Control: VSL StudioLive™ StudioLive™ Software 24.4.2/16.4.2 Library Owner’s ReferenceManual Manual VSL Will Not Launch (No Device Button in Universal Control Launch Window). VSL will not launch if the StudioLive is not connected and synced to your computer. Verify that your FireWire cable is connected both to your computer and to your StudioLive.
88 8.5 8.5 Troubleshooting Troubleshooting Troubleshooting youryour Troubleshooting iPad Ad iPad HocAd Network Hoc Network 8.5 Troubleshooting your iPad Ad Hoc Network StudioLive™ StudioLive™ Software 24.4.2/16.4.2 Library Owner’s ReferenceManual Manual Every once in a while, an iPad will accept an ad hoc network even though that network is not usable. When this happens, you will see the Wi-Fi icon in the top status bar on your iPad but you will not see your StudioLive in the Devices list in SL Remote.
Dinner is Served Added bonus: PreSonus’ previously Top Secret recipe for… Redfish Couvillion Ingredients: •• •• •• •• •• •• •• •• •• •• •• ¼ C Vegetable oil ¼ C flour 1 onion diced 1 clove garlic minced 1 green pepper diced 3 celery stalks diced 1 14oz can diced tomatoes 1 bottle light beer 2 bay leaves 1 tsp thyme 2 lbs Redfish fillets Cooking Instructions: 1. 2. 3. 4. 5. 6. 7. In a heavy saucepan or large skillet, heat oil on medium high and slowly add flour a tablespoon at a time to create a roux.
StudioLive Software Library Reference Manual ™ Universal Control with Virtual StudioLive and Smaart System Check Wizards | StudioLive Remote for iPad QMix for iPhone /iPod touch Capture | Studio One Artist ® ™ ® ™ ® ® ® 7257 Florida Boulevard • Baton Rouge, Louisiana 70806 USA • 1-225-216-7887 www.presonus.