
User Guide


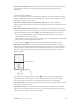

Table Of Contents
- iPod touch User Guide
- Contents
- Chapter 1: iPod touch at a Glance
- Chapter 2: Getting Started
- Set up iPod touch
- Connect iPod touch to your computer
- Connect to Wi‑Fi
- Connect to the Internet
- Apple ID
- iCloud
- Set up other mail, contacts, and calendar accounts
- Manage content on your iOS devices
- Sync with iTunes
- Date and time
- International settings
- Your iPod touch name
- View this user guide on iPod touch
- Tips for using iOS 8
- Chapter 3: Basics
- Chapter 4: Siri
- Chapter 5: Messages
- Chapter 6: Mail
- Chapter 7: Safari
- Chapter 8: Music
- Chapter 9: FaceTime
- Chapter 10: Calendar
- Chapter 11: Photos
- Chapter 12: Camera
- Chapter 13: Weather
- Chapter 14: Clock
- Chapter 15: Maps
- Chapter 16: Videos
- Chapter 17: Notes
- Chapter 18: Reminders
- Chapter 19: Stocks
- Chapter 20: Game Center
- Chapter 21: Newsstand
- Chapter 22: iTunes Store
- Chapter 23: App Store
- Chapter 24: iBooks
- Chapter 25: Health
- Chapter 26: Passbook
- Chapter 27: Calculator
- Chapter 28: Podcasts
- Chapter 29: Voice Memos
- Chapter 30: Contacts
- Appendix A: Accessibility
- Accessibility features
- Accessibility Shortcut
- VoiceOver
- Zoom
- Invert Colors and Grayscale
- Speak Selection
- Speak Screen
- Speak Auto-text
- Large, bold, and high-contrast text
- Button Shapes
- Reduce screen motion
- On/off switch labels
- Assignable tones
- Video Descriptions
- Hearing aids
- Mono audio and balance
- Subtitles and closed captions
- Siri
- Widescreen keyboards
- Guided Access
- Switch Control
- AssistiveTouch
- Voice Control
- Accessibility in OS X
- Appendix B: International Keyboards
- Appendix C: Safety, Handling, & Support
- Important safety information
- Important handling information
- iPod touch Support site
- Restart or reset iPod touch
- Reset iPod touch settings
- Get information about your iPod touch
- Usage information
- Disabled iPod touch
- VPN settings
- Profiles settings
- Back up iPod touch
- Update and restore iPod touch software
- Sell or give away iPod touch
- Learn more, service, and support
- FCC compliance statement
- Canadian regulatory statement
- Disposal and recycling information
- Apple and the environment
Appendix A Accessibility 144
Turn on AssistiveTouch. Go to Settings > General > Accessibility > AssistiveTouch, or use the
Accessibility Shortcut. See Accessibility Shortcut on page 124 . When AssistiveTouch is on, the
oating menu button appears on the screen.
Show or hide the menu. Tap the oating menu button, or click the secondary button on
your accessory.
Simulate pressing the Home button. Tap the menu button, then tap Home.
Lock or rotate the screen, adjust iPod touch volume, or simulate shaking iPod touch. Tap the
menu button, then tap Device.
Perform a swipe or drag that uses 2, 3, 4, or 5 ngers. Tap the menu button, tap Device >
More > Gestures, then tap the number of digits needed for the gesture. When the corresponding
circles appear on the screen, swipe or drag in the direction required by the gesture. When you
nish, tap the menu button.
Perform a pinch gesture. Tap the menu button, tap Favorites, then tap Pinch. When the pinch
circles appear, touch anywhere on the screen to move the pinch circles, then drag the pinch
circles in or out to perform a pinch gesture. When you nish, tap the menu button.
Create your own gesture. You can add your own favorite gestures to the control menu (for
example, tap and hold or two-nger rotation). Tap the menu button, tap Favorites, then tap an
empty gesture placeholder. Or go to Settings > General > Accessibility > AssistiveTouch > Create
New Gesture.
Example 1: To create the rotation gesture, go to Settings > General > Accessibility >
AssistiveTouch > Create New Gesture. On the gesture recording screen that prompts you to
touch to create a gesture, rotate two ngers on the iPod touch screen around a point between
them. (You can do this with a single nger or stylus—just create each arc separately, one after
the other.) If it doesn’t turn out quite right, tap Cancel, then try again. When it looks right, tap
Save, then give the gesture a name—maybe “Rotate 90.” Then, to rotate the view in Maps, for
example, open Maps, tap the AssistiveTouch menu button, and choose Rotate 90 from Favorites.
When the blue circles representing the starting nger positions appear, drag them to the point
around which you want to rotate the map, then release. You might want to create several
gestures with dierent degrees of rotation.
Example 2: Let’s create the touch and hold gesture that you use to start rearranging icons on
your Home screen. This time, on the gesture recording screen, hold down your nger in one spot
until the recording progress bar reaches halfway, then lift your nger. Be careful not to move
your nger while recording, or the gesture will be recorded as a drag. Tap Save and name the
gesture. To use the gesture, tap the AssistiveTouch menu button and choose your gesture from
Favorites. When the blue circle representing your touch appears, drag it over a Home screen icon
and release.
If you record a sequence of taps or drags, they’re all played back at the same time. For example,
using one nger or stylus to record four separate, sequential taps at four locations on the screen
creates a simultaneous four-nger tap.
Exit a menu without performing a gesture. Tap anywhere outside the menu. To return to the
previous menu, tap the arrow in the middle of the menu.
Move the menu button. Drag it anywhere along the edge of the screen.
Adjust your accessory tracking speed. Go to Settings > General > Accessibility >
AssistiveTouch > Touch speed.
Hide the menu button (with an accessory attached). Go to Settings > General > Accessibility >
AssistiveTouch > Always Show Menu.