
User Guide

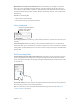

Table Of Contents
- iPhone User Guide
- Contents
- Chapter 1: iPhone at a glance
- Chapter 2: Get started
- Set up iPhone
- Connect to Wi-Fi
- Connect to the Internet
- Apple ID
- iCloud
- Set up other mail, contacts, and calendar accounts
- Manage content on your iOS devices
- Connect iPhone to your computer
- Sync with iTunes
- Date and time
- Apple Watch
- International settings
- Your iPhone name
- View this user guide on iPhone
- Tips for using iOS 8
- Chapter 3: Basics
- Use apps
- Continuity
- Customize iPhone
- Type text
- Dictate
- Voice Control
- Search
- Control Center
- Alerts and Notification Center
- Sounds and silence
- Do Not Disturb
- Sharing
- iCloud Drive
- Transfer files
- Personal Hotspot
- AirPlay
- AirPrint
- Use an Apple headset
- Bluetooth devices
- Restrictions
- Privacy
- Security
- Charge and monitor the battery
- Travel with iPhone
- Chapter 4: Siri
- Chapter 5: Phone
- Chapter 6: Mail
- Chapter 7: Safari
- Chapter 8: Music
- Chapter 9: Messages
- Chapter 10: Calendar
- Chapter 11: Photos
- Chapter 12: Camera
- Chapter 13: Weather
- Chapter 14: Clock
- Chapter 15: Maps
- Chapter 16: Videos
- Chapter 17: Notes
- Chapter 18: Reminders
- Chapter 19: Stocks
- Chapter 20: Game Center
- Chapter 21: Newsstand
- Chapter 22: iTunes Store
- Chapter 23: App Store
- Chapter 24: iBooks
- Chapter 25: Health
- Chapter 26: Passbook
- Chapter 27: FaceTime
- Chapter 28: Calculator
- Chapter 29: Podcasts
- Chapter 30: Compass
- Chapter 31: Voice Memos
- Chapter 32: Contacts
- Appendix A: Accessibility
- Accessibility features
- Accessibility Shortcut
- VoiceOver
- Zoom
- Invert Colors and Grayscale
- Speak Selection
- Speak Screen
- Speak Auto-text
- Large, bold, and high-contrast text
- Button Shapes
- Reduce screen motion
- On/off switch labels
- Assignable ringtones and vibrations
- Video Descriptions
- Hearing aids
- Mono audio and balance
- Subtitles and closed captions
- Siri
- Widescreen keyboards
- Large phone keypad
- LED Flash for Alerts
- Call audio routing
- Phone noise cancelation
- Guided Access
- Switch Control
- AssistiveTouch
- TTY support
- Visual voicemail
- Voice Control
- Accessibility in OS X
- Appendix B: iPhone in business
- Appendix C: International keyboards
- Appendix D: CarPlay
- Appendix E: Safety, handling, and support
- Important safety information
- Important handling information
- iPhone Support site
- Restart or reset iPhone
- Reset iPhone settings
- Get information about your iPhone
- Usage information
- Disabled iPhone
- Back up iPhone
- Update and restore iPhone software
- Cellular settings
- Sell or give away iPhone
- Learn more, service, and support
- FCC compliance statement
- Canadian regulatory statement
- Disposal and recycling information
- Apple and the environment

Chapter 6 Mail 59
Mark addresses outside certain domains. When you’re addressing a message to a recipient
that’s not in your organization’s domain, Mail can color the recipient’s name red to alert you.
Go to Settings > Mail, Contacts, Calendars > Mark Addresses, then dene the domains that you
don’t want marked. You can enter multiple domains separated by commas, such as “apple.com,
example.org.”
Use Siri. Say something like:
•
“New email to Jonah Schmidt”
•
“Email Simon and say I got the forms, thanks”
Get a sneak peek
Change how names are displayed
in Settings > Mail, Contacts,
Calendars > Short Name.
Change how names are displayed
in Settings > Mail, Contacts,
Calendars > Short Name.
See a longer preview. Go to Settings > Mail, Contacts, Calendars > Preview. You can show up to
ve lines.
Is this message for me? Go to Settings > Mail, Contacts, Calendars, then turn on Show To/Cc
Label. If the label says Cc instead of To, you were just copied. You can also use the To/Cc mailbox,
which gathers all mail addressed to you. To show or hide it, swipe to the right (or tap Mailboxes),
then tap Edit.
Finish a message later
Look at another message while you’re writing one. Swipe down on the title bar of a message
you’re writing. When you’re ready to return to your message, tap its title at the bottom of the
screen. If you have more than one message waiting to be nished, tap the bottom of the screen
to see them all.
Save a draft for later. If you’re writing a message and want to nish it later, tap Cancel, then tap
Save Draft. To get it back, touch and hold Compose.
With OS X Yosemite, you can also hand o unnished messages with your Mac. See About
Continuity features on page 26.