
User Guide
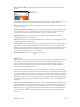
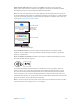
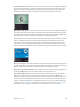

Table Of Contents
- iPhone User Guide
- Contents
- Chapter 1: iPhone at a glance
- Chapter 2: Get started
- Set up iPhone
- Connect to Wi-Fi
- Connect to the Internet
- Apple ID
- iCloud
- Set up other mail, contacts, and calendar accounts
- Manage content on your iOS devices
- Connect iPhone to your computer
- Sync with iTunes
- Date and time
- Apple Watch
- International settings
- Your iPhone name
- View this user guide on iPhone
- Tips for using iOS 8
- Chapter 3: Basics
- Use apps
- Continuity
- Customize iPhone
- Type text
- Dictate
- Voice Control
- Search
- Control Center
- Alerts and Notification Center
- Sounds and silence
- Do Not Disturb
- Sharing
- iCloud Drive
- Transfer files
- Personal Hotspot
- AirPlay
- AirPrint
- Use an Apple headset
- Bluetooth devices
- Restrictions
- Privacy
- Security
- Charge and monitor the battery
- Travel with iPhone
- Chapter 4: Siri
- Chapter 5: Phone
- Chapter 6: Mail
- Chapter 7: Safari
- Chapter 8: Music
- Chapter 9: Messages
- Chapter 10: Calendar
- Chapter 11: Photos
- Chapter 12: Camera
- Chapter 13: Weather
- Chapter 14: Clock
- Chapter 15: Maps
- Chapter 16: Videos
- Chapter 17: Notes
- Chapter 18: Reminders
- Chapter 19: Stocks
- Chapter 20: Game Center
- Chapter 21: Newsstand
- Chapter 22: iTunes Store
- Chapter 23: App Store
- Chapter 24: iBooks
- Chapter 25: Health
- Chapter 26: Passbook
- Chapter 27: FaceTime
- Chapter 28: Calculator
- Chapter 29: Podcasts
- Chapter 30: Compass
- Chapter 31: Voice Memos
- Chapter 32: Contacts
- Appendix A: Accessibility
- Accessibility features
- Accessibility Shortcut
- VoiceOver
- Zoom
- Invert Colors and Grayscale
- Speak Selection
- Speak Screen
- Speak Auto-text
- Large, bold, and high-contrast text
- Button Shapes
- Reduce screen motion
- On/off switch labels
- Assignable ringtones and vibrations
- Video Descriptions
- Hearing aids
- Mono audio and balance
- Subtitles and closed captions
- Siri
- Widescreen keyboards
- Large phone keypad
- LED Flash for Alerts
- Call audio routing
- Phone noise cancelation
- Guided Access
- Switch Control
- AssistiveTouch
- TTY support
- Visual voicemail
- Voice Control
- Accessibility in OS X
- Appendix B: iPhone in business
- Appendix C: International keyboards
- Appendix D: CarPlay
- Appendix E: Safety, handling, and support
- Important safety information
- Important handling information
- iPhone Support site
- Restart or reset iPhone
- Reset iPhone settings
- Get information about your iPhone
- Usage information
- Disabled iPhone
- Back up iPhone
- Update and restore iPhone software
- Cellular settings
- Sell or give away iPhone
- Learn more, service, and support
- FCC compliance statement
- Canadian regulatory statement
- Disposal and recycling information
- Apple and the environment

Chapter 26 Passbook 134
Use another card. Hold iPhone 6 or iPhone 6 Plus near the reader until your default card appears.
Tap the card to reveal all your cards in Passbook, tap the card you want to use, then place your
nger on Touch ID and hold iPhone near the reader until you feel it vibrate and see the Done
checkmark, indicating that the card information has been transmitted to the merchant.
Pay within an app. Make your selections for goods or services within an app. When checking out,
look for the Apple Pay payment option. Tap Apple Pay, then review the information that appears
(for example, the card you’re using for the payment, your email, and the shipping method). Make
any changes before using Touch ID or your passcode to complete the payment.
Activity details appear on the front of the credit card used for the purchase. In addition, you may
receive a notication with the merchant name, and the amount authorized for the purchase.
Your zip code may be provided to the merchant to calculate tax and shipping costs. Payment
information—such as billing and shipping addresses, email address, and phone number—may
also be provided to the merchant once you authorize the payment with Touch ID or a passcode.
Note:The authorized amount may be dierent from the amount of the payment charged to your
account. For example, a gas station may authorize $99, even though you only pump $25 worth of
gasoline. Always check your credit or debit card statement for the actual charges.
View your recent credit card activity. Tap a credit card. Your most recent activity may appear on
the front. Tap to view a list of your recent activity on the back of the card.
Suspend and remove cards. You have several options for suspending or removing credit and
debit cards. To remove a credit or debit card from Passbook, tap the card, tap
, then tap
Remove. To remove an inactive card, tap Remove on the front of the card. If your iPhone is lost or
stolen and you have enabled Find My iPhone, you can use it to help you locate and secure your
iPhone—including suspending or removing the ability to pay using your credit and debit cards
in Passbook. See Find My iPhone on page 46. You can log in to your account at iCloud.com and
remove your cards in Settings > My Devices. You can also call the issuers of your cards.