
User Guide
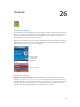


Table Of Contents
- iPhone User Guide
- Contents
- Chapter 1: iPhone at a Glance
- Chapter 2: Getting Started
- Set up and activate iPhone
- Connect iPhone to your computer
- Connect to Wi-Fi
- Connect to the Internet
- Apple ID
- Set up other mail, contacts, and calendar accounts
- iCloud
- Manage content on your iOS devices
- Sync with iTunes
- Date and time
- International settings
- Your iPhone name
- View this user guide on iPhone
- Tips for using iOS 8
- Chapter 3: Basics
- Use apps
- Continuity
- Customize iPhone
- Type text
- Dictate
- Voice Control
- Search
- Control Center
- Alerts and Notification Center
- Sounds and silence
- Do Not Disturb
- Sharing
- iCloud Drive
- Transfer files
- Personal Hotspot
- AirPlay
- AirPrint
- Use an Apple headset
- Bluetooth devices
- Restrictions
- Privacy
- Security
- Charge and monitor the battery
- Travel with iPhone
- Chapter 4: Siri
- Chapter 5: Phone
- Chapter 6: Mail
- Chapter 7: Safari
- Chapter 8: Music
- Chapter 9: Messages
- Chapter 10: Calendar
- Chapter 11: Photos
- Chapter 12: Camera
- Chapter 13: Weather
- Chapter 14: Clock
- Chapter 15: Maps
- Chapter 16: Videos
- Chapter 17: Notes
- Chapter 18: Reminders
- Chapter 19: Stocks
- Chapter 20: Game Center
- Chapter 21: Newsstand
- Chapter 22: iTunes Store
- Chapter 23: App Store
- Chapter 24: iBooks
- Chapter 25: Health
- Chapter 26: Passbook
- Chapter 27: FaceTime
- Chapter 28: Calculator
- Chapter 29: Podcasts
- Chapter 30: Compass
- Chapter 31: Voice Memos
- Chapter 32: Contacts
- Appendix A: Accessibility
- Accessibility features
- Accessibility Shortcut
- VoiceOver
- Zoom
- Invert Colors and Grayscale
- Speak Selection
- Speak Screen
- Speak Auto-text
- Large, bold, and high-contrast text
- Button Shapes
- Reduce screen motion
- On/off switch labels
- Assignable ringtones and vibrations
- Video Descriptions
- Hearing aids
- Mono audio and balance
- Subtitles and closed captions
- Siri
- Widescreen keyboards
- Large phone keypad
- LED Flash for Alerts
- Call audio routing
- Phone noise cancelation
- Guided Access
- Switch Control
- AssistiveTouch
- TTY support
- Visual voicemail
- Voice Control
- Accessibility in OS X
- Appendix B: International Keyboards
- Appendix C: iPhone in Business
- Appendix D: Safety, Handling, & Support
- Important safety information
- Important handling information
- iPhone Support site
- Restart or reset iPhone
- Reset iPhone settings
- Get information about your iPhone
- Usage information
- Disabled iPhone
- Back up iPhone
- Update and restore iPhone software
- Cellular settings
- Sell or give away iPhone
- Learn more, service, and support
- FCC compliance statement
- Canadian regulatory statement
- Disposal and recycling information
- Apple and the environment

Chapter 26 Passbook 12 7
Passbook & Apple Pay settings
Add and manage credit and debit cards. (iPhone 6 and iPhone 6 Plus) To add credit or debit
cards, manage existing cards, change the default payment card, modify the billing and shipping
addresses used for Apple Pay purchases, or change contact information for purchases, go to
Settings > Passbook & Apple Pay.
Keep passes from appearing on the Lock screen. Go to Settings > Touch ID & Passcode (iPhone
models with Touch ID) or Settings > Passcode (other models), then tap Turn Passcode On. Then,
Lock Screen.
Include passes on your other iOS devices. Go to Settings > iCloud and turn on Passbook.
Note: This setting applies only to the passes in Passbook, not to the credit or debit cards.