
User Guide

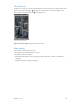

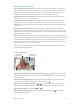
Table Of Contents
- iPhone User Guide
- Contents
- Chapter 1: iPhone at a Glance
- Chapter 2: Getting Started
- Chapter 3: Basics
- Use apps
- Customize iPhone
- Type text
- Dictate
- Voice Control
- Search
- Control Center
- Alerts and Notification Center
- Sounds and silence
- Do Not Disturb
- AirDrop, iCloud, and other ways to share
- Transfer files
- Personal Hotspot
- AirPlay
- AirPrint
- Use an Apple headset
- Bluetooth devices
- Restrictions
- Privacy
- Security
- Charge and monitor the battery
- Travel with iPhone
- Chapter 4: Siri
- Chapter 5: Phone
- Chapter 6: Mail
- Chapter 7: Safari
- Chapter 8: Music
- Chapter 9: Messages
- Chapter 10: Calendar
- Chapter 11: Photos
- Chapter 12: Camera
- Chapter 13: Weather
- Chapter 14: Clock
- Chapter 15: Maps
- Chapter 16: Videos
- Chapter 17: Notes
- Chapter 18: Reminders
- Chapter 19: Stocks
- Chapter 20: Game Center
- Chapter 21: Newsstand
- Chapter 22: iTunes Store
- Chapter 23: App Store
- Chapter 24: Passbook
- Chapter 25: Compass
- Chapter 26: Voice Memos
- Chapter 27: FaceTime
- Chapter 28: Contacts
- Chapter 29: Calculator
- Chapter 30: iBooks
- Chapter 31: Nike + iPod
- Chapter 32: Podcasts
- Appendix A: Accessibility
- Accessibility features
- Accessibility Shortcut
- VoiceOver
- Siri
- Zoom
- Invert Colors
- Speak Selection
- Speak Auto-text
- Large, bold, and high-contrast text
- Reduce onscreen motion
- On/off switch labels
- Hearing aids
- Subtitles and closed captions
- LED Flash for Alerts
- Mono audio and balance
- Call audio routing
- Assignable ringtones and vibrations
- Phone noise cancellation
- Guided Access
- Switch Control
- AssistiveTouch
- TTY support
- Visual voicemail
- Widescreen keyboards
- Large phone keypad
- Voice Control
- Accessibility in OS X
- Appendix B: International Keyboards
- Appendix C: iPhone in Business
- Appendix D: Safety, Handling, & Support
- Important safety information
- Important handling information
- iPhone Support site
- Restart or reset iPhone
- Reset iPhone settings
- Get information about your iPhone
- Usage information
- Disabled iPhone
- Back up iPhone
- Update and restore iPhone software
- Cellular settings
- Sell or give away iPhone?
- Learn more, service, and support
- FCC compliance statement
- Canadian regulatory statement
- Disposal and recycling information
- Apple and the environment

Chapter 15 Maps 87
•
Landmark (“guggenheim”)
•
Zip code
•
Business (“movies,” “restaurants san francisco ca,” “apple inc new york”)
Or if Maps guesses where you’re headed while you’re entering a search, tap that location in the
list below the search eld.
Find the location of a contact, or of a bookmarked or recent search. Tap .
Choose your view. Tap , then choose Standard, Hybrid, or Satellite.
Manually mark a location. Touch and hold the map until the dropped pin appears.
Get more info
Get info about a location. Tap a pin to display its banner, then tap . Info might include Yelp
reviews and photos, a phone number (tap to call it), a webpage link, directions, and more.
Tap Share to share the location. See AirDrop, iCloud, and other ways to share on page 32.
Get directions
Get driving directions. Tap , tap , enter the starting and ending locations, then tap Route. Or
choose a location or a route from the list, if available. If multiple routes appear, tap the one you
want to take. Tap Start to begin.
•
Hear turn-by-turn directions: (iPhone 4s or later) Tap Start.
Maps follows your progress and speaks turn-by-turn directions to your destination. To show or
hide the controls, tap the screen.
If iPhone auto-locks, Maps stays onscreen and continues to announce instructions. You can
also open another app and continue to get turn-by-turn directions. To return to Maps, tap the
banner across the top of the screen.
With turn-by-turn directions, night mode automatically adjusts the screen image for easier
viewing at night.
•
View turn-by-turn directions: (iPhone 4) Tap Start, then swipe left to see the next instruction.
•
See the route overview: Tap Overview.
•
View the directions as a list: Tap .
•
Stop turn-by-turn directions: Tap End.
Get directions from your current location. Tap on the banner of your destination. If you’re a
walker, set your directions preference to Walking in Settings > Maps.
Get walking directions. Tap , then tap . Enter the starting and ending locations, then tap
Route. Or choose a location or a route from the list, if available. Tap Start, then swipe left to see
the next instruction.
Get public transit directions. Tap , then tap . Enter the starting and ending locations, then
tap Route. Or choose a location or a route from the list, if available. Download and open the
routing apps for the transit services you want to use.
Find out about trac conditions. Tap , then tap Show Trac. Orange dots show slowdowns,
and red dots show stop-and-go trac. To see an incident report, tap a marker.
Report a problem. Tap , then tap Report a Problem.