
User Guide

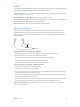

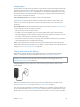
Table Of Contents
- iPhone User Guide
- Contents
- Chapter 1: iPhone at a Glance
- Chapter 2: Getting Started
- Chapter 3: Basics
- Use apps
- Customize iPhone
- Type text
- Dictate
- Voice Control
- Search
- Control Center
- Alerts and Notification Center
- Sounds and silence
- Do Not Disturb
- AirDrop, iCloud, and other ways to share
- Transfer files
- Personal Hotspot
- AirPlay
- AirPrint
- Use an Apple headset
- Bluetooth devices
- Restrictions
- Privacy
- Security
- Charge and monitor the battery
- Travel with iPhone
- Chapter 4: Siri
- Chapter 5: Phone
- Chapter 6: Mail
- Chapter 7: Safari
- Chapter 8: Music
- Chapter 9: Messages
- Chapter 10: Calendar
- Chapter 11: Photos
- Chapter 12: Camera
- Chapter 13: Weather
- Chapter 14: Clock
- Chapter 15: Maps
- Chapter 16: Videos
- Chapter 17: Notes
- Chapter 18: Reminders
- Chapter 19: Stocks
- Chapter 20: Game Center
- Chapter 21: Newsstand
- Chapter 22: iTunes Store
- Chapter 23: App Store
- Chapter 24: Passbook
- Chapter 25: Compass
- Chapter 26: Voice Memos
- Chapter 27: FaceTime
- Chapter 28: Contacts
- Chapter 29: Calculator
- Chapter 30: Nike + iPod
- Appendix A: Accessibility
- Accessibility features
- Accessibility Shortcut
- VoiceOver
- Siri
- Zoom
- Invert Colors
- Speak Selection
- Speak Auto-text
- Large and bold text
- Reduce screen motion
- Display on/off switch labels
- Hearing aids
- Subtitles and closed captions
- LED Flash for Alerts
- Mono Audio
- Route the audio of incoming calls
- Assignable ringtones and vibrations
- Ambient Noise Cancellation
- Guided Access
- Switch Control
- AssistiveTouch
- TTY support
- Visual voicemail
- Widescreen keyboards
- Large phone keypad
- Voice Control
- Accessibility in OS X
- Appendix B: iPhone in Business
- Appendix C: International Keyboards
- Appendix D: Safety, Handling, & Support
- Important safety information
- Important handling information
- iPhone Support site
- Restart or reset iPhone
- Reset iPhone settings
- Get information about your iPhone
- Usage information
- Disabled iPhone
- Back up iPhone
- Update and restore iPhone software
- Cellular settings
- Sell or give away iPhone?
- Learn more, service, and support
- FCC compliance statement
- Canadian regulatory statement
- Disposal and recycling information
- Apple and the environment

Chapter 3 Basics 38
Find My iPhone
Find My iPhone can help you locate and secure your iPhone using the free Find My iPhone app
(available in the App Store) on another iPhone, iPad, or iPod touch, or using a Mac or PC web
browser signed in to www.icloud.com. Activation Lock is enabled automatically when you turn
on Find My iPhone. It can help deter theft by requiring your Apple ID and password if anyone
tries to erase or reactivate your iPhone.
Turn on Find My iPhone. Go to Settings > iCloud > Find My iPhone.
Important: To use Find My iPhone features, Find My iPhone must be turned on before your
iPhone is lost. iPhone must be able to connect to the Internet for you to locate and secure
the device.
Use Find My iPhone. Open the Find My iPhone app on an iOS device, or go to www.icloud.com
on your computer. Sign in and select your device.
•
Play Sound: Play a sound for two minutes.
•
Lost Mode: You can immediately lock your missing iPhone with a passcode and send it a
message displaying a contact number. iPhone also tracks and reports its location, so you can
see where it’s been when you check the Find My iPhone app.
•
Erase iPhone: Protects your privacy by erasing all the information and media on your iPhone
and restoring iPhone to its original factory settings.
Note: To turn o Activation Lock and erase your personal information, you should erase your
iPhone before selling or giving it away. Go to Settings > General > Reset > Erase All Content and
Settings. See Sell or give away iPhone? on page 15 0 .
Charge and monitor the battery
iPhone has an internal, lithium-ion rechargeable battery. For more information about the
battery—including tips for maximizing battery life—go to www.apple.com/batteries.
WARNING: For important safety information about the battery and charging iPhone, see
Important safety information on page 143.
Charge the battery. Connect iPhone to a power outlet using the included cable and USB
power adapter.
Note: Connecting iPhone to a power outlet can start an iCloud backup or wireless iTunes
syncing. See Back up iPhone on page 148 and Sync with iTunes on page 18.
You can also charge the battery by connecting iPhone to your computer, which also allows you
to sync iPhone with iTunes. See Sync with iTunes on page 18. Unless your keyboard has a high-
power USB 2.0 or 3.0 port, you must connect iPhone to a USB 2.0 or 3.0 port on your computer.