
User guide

2i>clicker User Guide Windows/PC
Obtaining the i>clicker Software
Don’t have the i>clicker software yet? You may download the latest i>clicker software free of charge
from the i>clicker web site.
To get i>clicker from the web:
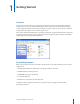
1 Go to the i>clicker website at www.iclicker.com.
2 In the top navigation, select Downloads and click Instructor.
3 In the Instructor Downloads section under i>clicker 5.5, click Windows.
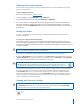
4 The i>clicker software is downloaded and extracted. Navigate to the location on your hard drive to
which you saved the le. Double-click the le to extract it. No additional installation is needed. The
zipped le extracts to an iclicker Win folder that can be moved or copied to a ash drive, hard drive, or
network drive.
Setting Up i>clicker
i>clicker is a plug-and-play system that requires no installation and minimal set-up for both the
hardware and software.
To set up your computer and folder structure:
1 Connect the i>clicker receiver base to your computer through the USB port. The LCD screen on the
receiver will light up, signaling that your computer is powering it. Your computer will notify you that it
recognizes new hardware and inform you when it is ready to use this hardware. This step may take a few
seconds to complete.
IMPORTANT: To be sure that the receiver has sucient power, plug the receiver directly into the computer and do
not connect through the keyboard or a non-powered USB hub.
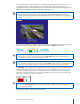
2 Connect the i>clicker ash drive to the USB port on the back of the i>clicker receiver base.
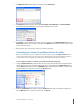
3 Navigate to My Computer to locate and double-click the ash drive (usually the E or F drive or called
a Removable Disk by the system). The ash drive contains two folders: iclicker Win and i>clicker Mac.
These folders contain the software for PC and Mac users respectively.
NOTE: We recommend you double-click the WebUpdate icon the rst time you use i>clicker.
WebUpdate will walk you through the steps to ensure you are using the latest version of
i>clicker. The latest software can also be downloaded free of charge from www.iclicker.com.
The benet of using the ash drive is that the i>clicker software is fully portable – just insert the ash
drive into any computer to access i>clicker and your course folders. You may also copy and paste
the iclicker Win folder to use i>clicker from any location, such as a network or computer hard drive.
However, you will need to have easy access to the iclicker Win folder location during your lectures. In
order to track your class’s voting data, you must be able to access the same i>clicker folder from this
location every time you start polling in class.
Creating Your Courses in i>clicker
IMPORTANT: For i>clicker 5.3 and earlier users, it is no longer necessary to make a separate copy of
the MyCoursePC folder for each i>clicker class or section. A single copy of the new iclicker Win
folder now gives you access to all your courses and sections.
1 Double-click the i>clicker icon to start the program.
i>clicker
icon