
User guide

28i>clicker User Guide Windows/PC
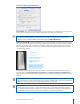
General Settings/Preferences
Course Name: The course name eld shows the course name that you entered when you created your
course. You can change your course name by editing the text in the course name eld.
NOTE: Editing the course name in General Preferences only aects the course name that appears
in i>grader, on the Main Menu screen, and on your reports. To change the course name on the
Welcome screen you must edit the course folder name in i>clicker Win\Classes.
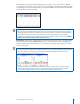
Instructor’s Remote ID: You may designate one remote as the Instructor’s Remote for your own use in
class. The Instructor’s Remote controls polling and moves between slides in your presentation software,
allowing you freedom to move around the room while conducting i>clicker polling sessions. Rather
than counting the ve choices (A, B, C, D, E,) as student votes, the buttons control key functions of the
i>clicker polling software.
To activate the Instructor’s Remote, enter the clicker’s serial ID (located on the bottom of the back of
your i>clicker) in the Designated Instructor’s Remote eld in General Settings and Preferences. If
you plan to use the Instructor’s Remote regularly, we recommend you set the code for the entire course
(or term).
TIP: Many teachers use the blue remote as their Instructor’s Remote. There are no technical
dierences between a blue Instructor’s Remote and a white student remote. The color is designed to
make it easier for you to keep track of your individual and loaner remotes.
TIP: To use the C and D functions on the Instructor’s Remote, your presentation software must be the
“active” application on your PC. i>clicker will still oat above your presentation software. However,
if i>clicker becomes the “active” program, once on your presentation program screen to make it the
active application again and enable the C and D buttons on the Instructor’s Remote.