
User guide


12i>clicker User Guide Windows/PC
TIP: Students can use a single i>clicker remote for multiple classes and only need to register on the
web once. If a student makes a registration mistake they can simply register a second time.
In-Class/Roll Call Registration (Option 2)
This registration option is only recommended for small classes with fewer than 50 students. The two
registration options (Web and Roll Call) can also be used in combination.
To use Roll Call, your computer screen needs to be projected so that all students can see it.
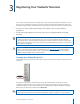
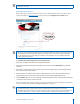
1 Launch i>clicker and click start session.
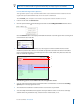
2 Click the options button on the oating toolbar and select Loan/Register Clickers from the menu.
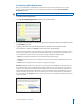
Click the Roll Call button in the displayed window. The Roll Call screen will appear with a scrolling list of
names from the class roster le.
3 When names scroll into the central blue area, letters appear in the rst column of boxes. Instruct
students to press the letter on their i>clicker that corresponds to the letter next to their name. Once
they’ve entered the rst letter, a new letter appears in the second column. They must also enter that
letter to conrm the registration.
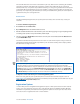
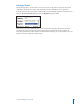
The following options are available in the roll call registration screen:
1 You can control the speed at which your students’ names scroll down the screen with the Scrolling
Speed option in the top right hand corner.
2 The instructions for students are outlined on the screen and are easy to follow.
3 You can modify the information that appears about your students on the screen. Choose to display
Student names only, Student IDs only, or both. For more on this feature, see ??.
2
3
1