
User guide


10i>clicker User Guide Windows/PC
The roster le must have one line for each student in your class, with each line containing the student’s
Last Name, First Name, and Student ID, separated by commas. The Student ID may be a college ID
number, email alias, or any other easily readable text string—as long as it is guaranteed to be unique for
each student. We recommend that you use an ID number or naming convention that you currently use
(personally or as required by your institution) to record your students’ other grades, for easiest import of
i>grader data into your course grade book.
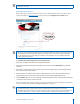
Roster.txt File
The Microsoft Notepad application (or any other plain text editor) can be used to easily create your
roster le.
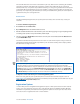
To create a TXT le using Notepad:
1 Go to Start and select Accessories.
2 Open Notepad from the list of Microsoft Accessories.
3 Add the student information for each student in your class either by typing or copy and pasting it from
an existing roster (in Excel or any other format) into Notepad.
4 Save the roster le as Roster.txt. the le must be saved in your course folder (within the Classes folder
in your iclicker Win folder).
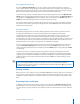
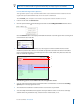
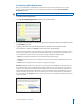
You will need to follow the steps above for each section or course in which you are using i>clicker. An
example Roster.txt le (shown below) is provided in your class folder. You may wish to simply edit this
le rather than creating a new one.
TIP: If you have your course roster in Excel format, you can avoid re-typing your entire roster. Make
sure the columns in your roster follow the format in the example above (last name, rst name,
student ID) and that there is only one student per row. Then save the document as a .csv le, name it
Roster.csv, and save it to your iclicker Win\Classes\[course name] folder. Open your iclicker Win\
Classes\[course name] folder. Delete or rename the Roster.txt le. Then rename the Roster.csv le
to Roster.txt. Open the le and spot-check it to make sure it is formatted correctly.
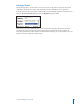
To import a course roster from your course management system:
Refer to the user guide for your specic CMS, which is located in the Customer Support section of
www.iclicker.com. Following the instructions provided for your specic CMS, save the CMS roster to your
iclicker Win\Classes\[course name] folder.
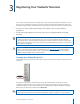
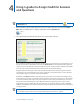
Registration Options
i>clicker oers you three straightforward registration options: a web option that can be done outside
of class, an in-class option for your entire class, and a manual option for individual students. Minimal
information is required of your students and all registration options are tied to your class roster. There
are no site license or registration fees for i>clicker software.