
User guide


7i>clicker User Guide Windows/PC
6 To stop displaying the graph, click HIDE.
TIP: You can also display or hide the student response graph by pressing the B button on the
instructor’s remote. You can designate a correct answer by cycling through the choices with the E
button on the instructor’s remote.
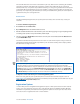
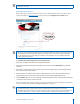
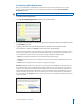
Your receiver’s LCD screen also displays voting results and is updated every second when polling is
active. Information on the screen includes the timer (upper left), the total vote count (upper right), and
the percentage distribution of votes across the ve answer choices (bottom).The LCD screen is a useful
tool to monitor student voting progress and choices without displaying the graph to the whole class
A Timer
B Number of responses received
C Percentage of total votes for responses A-E
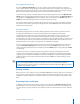
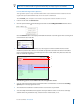
Floating Toolbar Options
The oating toolbar contains buttons for three key functions: START/STOP polling, DISPLAY/HIDE and
access to the Options menu . Click the arrow button to access the Options pull-down menu and
reveal the following options:
Loan/Register Clickers Manually register an individual clicker, permanently or for just one session, or
initiate In-Class/Roll-Call registration. For more information on in-class and manual
registration options, see page 12 of this Guide.
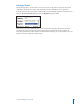
Question On the Fly Ask a spontaneous question and have it recorded as a screen capture without closing
out of your presentation application.
Settings and Preferences Access the program settings and preferences directly from i>clicker. For more
information about these options, see pages 27 of this Guide.
Anonymous Polling Ask a question and collect polling results without any student information associated
with them. This type of question is particulary useful for polling students on sensitive
topics where they may not want their names or student IDs associated with their
answers.