
User guide


1 - The Basics: Setting Up and Starting i>clicker
Connect i>clicker to Your Computer
i>clicker is a plug-and-play system that requires no installation and minimal set-up for both the hardware and
software.
To set up i>clicker:
1. Connect the i>clicker base receiver to your computer through a USB port. The LCD screen on the
receiver will light up indicating that the receiver has power. Your computer may notify you that it
recognizes new hardware and inform you when it is ready to use this hardware. This step may take a
few seconds to complete.
IMPORTANT: To be sure that the receiver has sufficient power, plug the receiver directly into the computer
and do not connect through the keyboard or a non-powered USB hub. For best performance, it is
recommended that you plug the i>clicker receiver into a USB 2.0 port.
2. If you are running i>clicker from a flash drive, connect the i>clicker flash drive to the USB port on the
back of the i>clicker receiver.
NOTE: If you receive a message indicating that you have plugged a high-speed USB device into a non high-
speed USB port, it is recommended that you plug the flash drive into a USB port on your computor or copy
the iclicker Win or iclicker Mac folder to your computer hard drive. Doing so will improve the overall
performance of the i>clicker software.
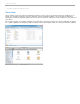
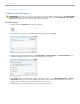
3. Double-click the flash drive icon that appears on your desktop. The i>clicker flash drive contains two
folders: iclicker Win and iclicker Mac. These folders contain the software for PC and Mac users
respectively.
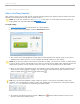
NOTE: It is recommended that you double-click the WebUpdate icon the first time you use i>clicker.
WebUpdate will walk you through the steps to ensure you are using the latest version of i>clicker. The
latest software can also be downloaded free of charge from iclicker.com.
Running the i>clicker software from a flash drive is not required. The benefit of using the flash drive
is that the i>clicker software is fully portable – just insert the flash drive into any computer to access
i>clicker and your course folders. You may also copy and paste the iclicker Win or iclicker Mac
folder to use i>clicker from any location, such as a network or computer hard drive. You will need to
have easy access to the iclicker Win or iclicker Mac folder location during your lectures. In order
to track your class’s voting data, you must be able to access the same i>clicker folder from this
location every time you start polling in class.
NOTE: The i>clicker Gen1 (black) receiver includes a USB 1.0 port. If you are running i>clicker v6.1, it is
recommended that you plug your i>clicker flash drives directly into your computer's USB port instead of
plugging into the USB port on the Gen1 receiver. Plugging into your computer USB port will provide
optimum performance. The i>clicker Gen2 (white) receiver includes a USB 2.0 port. If you are using the
white base, you may plug your i>clicker v6.1 flash drive into either the computer USB port or the USB port
on the white base.
i>clicker v6.1 User Guide 7