
User guide


2 - Preparing for Class > Registering Your Students
Create a Course Roster
Associating or registering a student with his or her remote ID is required before a student can receive individual credit
for voting in class. To register your students, you must first create a file containing student information in your course
folder. If you are not planning to integrate voting data with your CMS system, you will create a text file named
Roster.txt.
NOTE: Students can still vote with their i>clicker remotes before registering but until they’ve registered their
remotes, their votes will be linked within i>grader to only the i>clicker remote ID.
The roster file must have one line for each student in your class, with each line containing the student’s Last Name,
First Name, and Student ID, separated by commas. The Student ID may be a college ID number, email alias, or any
other easily readable text string—as long as it is guaranteed to be unique for each student. We recommend that you
use an ID number or naming convention that you currently use (personally or as required by your institution) for
easiest import of i>grader data into your course grade book.
To create/edit a Roster.txt file:
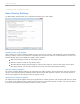
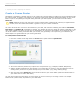
1. From the i>clicker Home Page select the Course menu option and then Open Roster.
Open Roster menu option from i>clicker Home Page
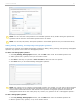
2. The course roster file (Roster.txt) is opened in a word processor (e.g., Notepad, TextEdit, SimpleText).
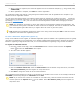
3. Add the student information for each student in your class either by typing or copy and pasting it from an
existing roster (in Excel or any other format) into your text editor. (e.g., Song, Patrick, psong).
4. Save the roster file as Roster.txt. the file must be saved in your course folder (within the Classes folder in
your iclicker Win or iclicker Mac folder).
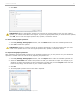
You will need to follow the steps above for each section or course in which you are using i>clicker. An example
Roster.txt file (shown below) is provided in your class folder.
i>clicker v6.1 User Guide 26