
Instruction Manual

- 10 -
after it’s dipped into the test solution and then let it stand still. Wait for the stable
measurement (a smiley face appears and stays) and then record the readings. When test is
finished, place the electrode in the storage bottle and tighten the cap in order to keep the
sensitivity of the pH sensor.
5.3 Calibration:
5.3.1. Switch in power, press < > key to turn on.
5.3.2. Short press < MODE > key to switch to mode.
5.3.3. Insert the pH electrode (remove the storage cap) into the meter’s socket.
5.3.4. Press < CAL > to enter calibration mode, LCD flashes indicating to make
the 1
st
point calibration.
5.3.5. Rinse pH electrode in distilled water, allow it to dry and submerge it in pH7.00 buffer
solution. Stir the solution briefly and allow it to stay in the buffer solution until reading is
stable and icon appears and stays, then press < CAL >, LCD flashes 7.00 pH,
calibration finishes after several seconds and then flashes, indicating the 1
st
point
calibration has been finished and the 2
nd
point calibration begins.
5.3.6. Take out the pH electrode, rinse it in distilled water, allow it to dry and submerge it in
pH4.00 buffer solution. Stir the solution briefly and allow it to stay in the buffer solution until
reading is stable and
icon appears and stays, then press < CAL >, LCD flashes
4.00pH, calibration finishes after several seconds and then flashes, indicating the
2
nd
point calibration has been finished and the 3rd point calibration begins.
5.3.7. Take out the pH electrode, rinse it in distilled water, allow
it to dry and submerge it in pH 10.01 buffer solution. Stir the
solution briefly and allow it to stay in the buffer solution until
reading is stable and icon appears and stays, then press
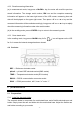
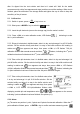
< CAL >, LCD flashes 10.01pH,calibration finishes while
displaying a stable pH and temperature value.
icon appears on the screen,
indicating 3 points calibration has been finished. See picture (4-1).
5.3.8. Notes
(a) The meter can perform 1 point, 2 points and 3 points of automatic calibration. When the 1
st
point calibration finished, press < ENTER > key to confirm and enter measuring mode.
ON
OFF