
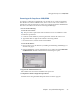
Specifications

Setting Up the Snap Server 14000
Chapter 2 Setup and Initial Configuration 27
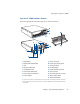
6
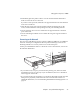
Immediately place the plastic washers over the studs and fasten the knurled
heads to secure the server to the rack.
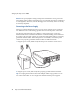
If you have a four-post rack, attach the rear support brackets to the rack and then
to the server as follows:
7
Align the slots on the rear support brackets with the mounting holes on the
server, and then mark the corresponding rear rack post mounting locations.
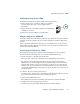
8
Use the four long silver screws to attach the rear support brackets to the back
posts of the rack.
9
Use the remaining four black screws to attach the long rear support brackets to
the server.
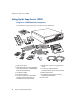
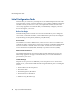
Connecting to the Network
The server has dual-Ethernet ports to connect to 10BaseT, 100BaseTx, or 1000BaseT
networks. A dual-port configuration offers important advantages, such as load
balancing and failover. You may connect one or both of the ports.
Use the provided Ethernet cables to connect the server to the network, as shown in
the following illustration:
• If you connect only one port, you must use the primary port, which is located
beneath the two fans (see page 25). If you use Ethernet2, the server’s IP address
will not appear on the LCD.
• If you connect both ports and plan to use a bonded configuration, make sure that
both ports are physically connected to the network on the same subnet. For
additional information, see “Understanding Dual-Ethernet Bonding Options” on
page 39.