
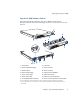
Specifications

Installing and Using Snap Server Management Applications
Chapter 1 Getting Started 5
Launching NASManager
Launch NASManager using one of the methods described in the following table:
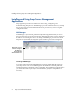
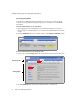
Using NASManager
Use NASManager to perform the following tasks. Detailed instructions for
performing these tasks are provided in the NASManager online help.
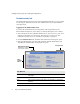
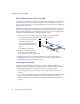
• Discovering Snap Servers —
At startup, NASManager broadcasts discovery
request packets to its local network segment; Snap Servers on the same network
segment that receive discovery requests respond with information. You can add
other Snap Servers (Guardian OS only) that reside outside the local network
segment by entering their IP addresses in NASManager’s Remote Server List.
• Getting Information —
This function is a read-only screen that displays
information about the server, including the server hardware, GuardianOS
version, and server status. It also provides network information, such as IP
address, gateway and Ethernet address of the primary Ethernet port.
• Setting IP Addresses —
This function allows you to set a DHCP-assigned or a
static IP address for the first Ethernet interface (Ethernet1) on a Snap Server.
• Launching the Administration Tool —
This function opens your Web browser to
the Administration Tool for the selected server.
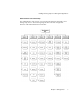
Operating System Procedure
Microsoft Windows XP/Me/
2000/95/98/NT
Click Start. Point to Programs > NASManager, then
select NASManager.
Macintosh Open the NASManager folder and double-click the
NASManager icon.
UNIX/Linux For default options:
cd to home directory, then run the NASManager
command: ./runNASManager
If you selected not to create links:
cd to home directory, then cd to the NASManager
directory, and run the NASManager command:
./NASManager