
Installation guide


NetBotz Rack Access Pod 170 Installation Guide
5
Install the Rack Access Pod
Choose the option below that meets your needs. Then connect the Rack Access
Pod to your appliance by following the instructions in the installation and quick
configuration manual included with the appliance.
Note: Install the Rack Access Pod in an environment compatible
with the environmental specifications on page 9.
Note: When you install the Rack Access Pod in the rack, do not
create a hazardous condition due to uneven mechanical loading.
For example, do not use the Rack Access Pod as a shelf.
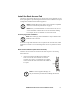
Toolless peg-mount installation
Note: The toolless peg-mount installation is only available with a
NetShelter VX or SX rack.
In the left or right cable channel in the rear panel of the rack enclosure, install
the Rack Access Pod in a set of mounting holes. Be sure to push down until it
locks.
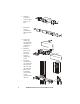
Rack-mount installation (with Sensor Pod 150)
The Rack Access Pod can be mounted in the same U-space as an existing
Sensor Pod 150.
1. Choose a location for the Rack Access Pod in the
front or rear of the rack. The Rack Access Pod
occupies one U-space. A notched hole or a number
on the vertical rail of the rack denotes the middle of
a U-space.
Note: To avoid equipment damage, use
only the hardware provided when installing the brackets.