
Owners manual


91KVM Access Management Software User Manual
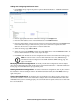
4. For the Time Range:
a. Selecting All exports all the records in the database.
b. To export records for a particular time period, select the Include radio button and set the
time parameters with the From and To settings. To export all records that do not include a
particular time period, select the Exclude radio button and set the time parameters that you
do not want to include with the From and To settings.
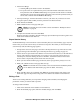
5. For Export File Type, click the radio button in front of your choice. If you choose one of the
encryption options (AES or DES), enter the password in the Password field.
6. When finished, click Next.
7. Make schedule choices in the pages that open.
Note: The schedule choices are similar to those described for “Backup the Server
Database” on page 84.
8. Complete the schedule choices and click Next.
When the procedure completes, the Tasks main page opens and the Export Event Log task is now
added to the Sidebar and the Task List.
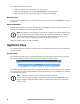
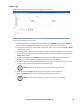
Export Session History
KVM ACCESS keeps a record of all user sessions that take place (see Session History, page 193). This
function lets you save the session history of each device and port to file. When you choose the Export
session history task, the following page appears:
1. Except for the device list, this page is the same as the Export Device Log. Fill in the rest of the
page according to the information given under Export Device Log, starting on page 170.
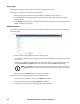
2. For the device list, put a check in the checkbox in front of the desired devices (or check the box at
the top of the column to select them all). If you prefer to only export the session history for
selected ports, instead of clicking the device's checkbox, click the arrowhead in front of the
device's name to expand the port list and click to select the ports.
3. When you have finished with this page, click Next (at the top-right of the panel), to move on.
4. Make your schedule choices in the pages that come up.
Note: The schedule choices are similar to the ones described for the Backup master
server database task. Refer back to page 162 for details, if necessary.
5. When schedule choices are completed, click Next. The procedure finishes and returns to the
Tasks main page. The Export Event Log task is now added to the Sidebar and the Task List.
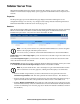
Editing a Task
There are two editing tasks that you can perform: changing a task's schedule, and changing the
parameters of what you want the task to perform.
To change a task's schedule:
1. Click on the task name on the Sidebar or in the Task List.
2. When the Schedule page opens, make the schedule changes, then click Save.