
Quick Start Guide


3
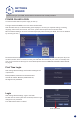
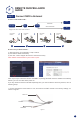
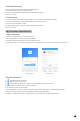
STEP 1. Right click mouse for quick shortcut menu and select Main Menu
STEP 2. Click Setup, then choose Basic menu
STEP 3. Select the desired Video Output resolution
STEP 4. Click Apply to save the settings
STEP 5. Click Exit to restart system, and then Login
NB: The default value is 1024 x 768 so choose the max output resolution your monitor supports, to
view the best resolution
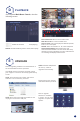
MOTION
C
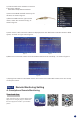
Select Camera. Tick the Camera Channel you want
to record on motion detection.
Holding Time. Set recording time length after
motion stops.
Trigger. Multiple channels can be set to record
when motion is detected by one of cameras. For
example, when camera 1 detects motion,camera 2
and camera 3 can be triggered to record as well.
Area. It is possible to set the sensitivity area of
camera viewing range.
Click STAR
to make the whole viewing range
as sensitivity area;
Click Trash Box
to remove areas;
Click and drag mouse to draw or erase the sensitive
area.
Click to save setting Click to exit
As color and luminance are important for sensitivity, it is necessary to adjust its value under speci c
conditions.
The default value is 4 while value range is from 1 to 8.
Right click the mouse to show or hide the control menu at the bottom of the screen.
Test the setting by moving something or ask someone to walk through the grid area within the camera view
range. If the DVR detects movement within the grid area, a yellow gure would be presented in the screen.
The grid should not cover fl ags, trees or other movable objects to avoid any false alerts.
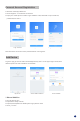
CHANGING DISPLAY RESOLUTION
Optimize the NVR Video output to match the monitor output, using the following steps:
NB: Make sure the monitor supports the same resolution as your NVR output resolution,
otherwise the monitor will be unable to display the video.