
Installation guide


13
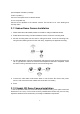
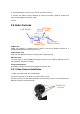
3. Plug an Ethernet cable into the Camera
Connect an Ethernet cable to the LAN socket located on the Network Camera’s bottom and attach it
to the network.
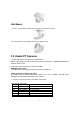
4. Connect the external power supply to Camera
5. Done
3. Camera administration
When you installed your networked device over your network environment, to start Network
Camera web configuration, you must have the web browsers installed on computer for web
management.
- Microsoft internet Explorer 6.0 or higher
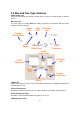
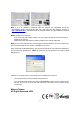
At first, user may use “IP Wizard II” utility to search all networked devices in the LAN.
Use “IP Wizard II” to locate IP address
Press “Search” button. IP Wizard II will list all networked devices in the LAN:
View function:
If IP Wizard II finds network devices, View button will be available. Please select the device
you want to view and click the View button. Furthermore you could double click the left
button of mouse to link to the network device by browser.
LAN setting function:
The utility featured with “LAN” setting function to help user to modify the IP parameters of
the installed network devices. User can step by step to setup IP address, username and
password.